
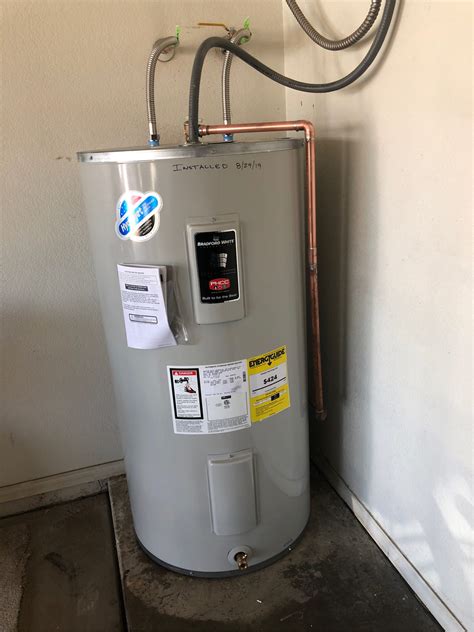
Gas Water Heater Venting
1. Shut off the Water, Gas, or Electricity
Before starting the replacement process, turn off the water supply to the water heater. For gas water heaters, also turn off the gas supply using the shut-off valve. If you have an electric water heater, switch off the circuit breaker dedicated to the water heater.
2. Drain the Water Heater Tank
Connect a garden hose to the drain valve located at the bottom of the water heater tank. Place the other end of the hose in a suitable drainage area, such as a floor drain or outdoors. Open the drain valve and allow the water to completely drain from the tank.
Disconnecting the Old Water Heater
1. Disconnect the Water Lines
Using a wrench, loosen the fittings connecting the hot and cold water lines to the water heater. Once loose, carefully detach the lines from the water heater.
2. Disconnect the Electrical or Gas Lines
For electric water heaters, turn off the circuit breaker and detach the electrical wires connected to the water heater. For gas water heaters, use a wrench to disconnect the gas supply line from the heater.
3. Disconnect the Water Heater Vent (Gas Heaters Only)
If you have a gas water heater, disconnect the vent pipe from the top of the water heater. This involves loosening the fasteners or unclamping the vent pipe to separate it from the heater.
Swapping the Old Water Heater for the New
1. Install the Relief Valve and Other Fittings
Remove the relief valve from the old water heater and attach it to the new one. Additionally, transfer any other necessary fittings from the old heater to the new one.
2. Connect the Water Lines
Attach the hot and cold water lines to the corresponding connections on the new water heater. Use a wrench to tighten the fittings securely.
3. Connect the Gas or Electrical Lines
For gas water heaters, reconnect the gas supply line using a wrench. Ensure the connection is tight but avoid overtightening. For electric water heaters, reconnect the electrical wires, ensuring proper connections and following electrical safety guidelines.
4. Reconnect the Vent (Gas Heaters Only)
For gas water heaters, reattach the vent pipe to the new water heater. Ensure a secure and tight connection to prevent any gas leaks.
Completing the Installation
1. Fill the Tank and Check for Leaks
Open the water supply valve to fill the water heater tank. While filling, carefully inspect all connections for any signs of leaks. If any leaks are detected, tighten the fittings as needed or seek professional assistance.
2. Turn on the Gas or Electricity
For gas water heaters, turn on the gas supply valve. For electric water heaters, switch on the dedicated circuit breaker. Verify that the pilot light (if applicable) is lit and functioning correctly.
3. Verify Proper Operation
Allow the water heater to heat the water to the desired temperature. Check for any abnormal noises, odors, or malfunctions. If you notice any issues, consult the manufacturer’s instructions or contact a professional plumber.
FAQ
1. How often should a water heater be replaced?
The average lifespan of a water heater is around 10 to
15 years. However, factors such as maintenance, water quality, and usage patterns can affect its longevity. It is recommended to consider replacement if your water heater is more than 10 years old or shows signs of significant deterioration.
2. Can I install a water heater myself?
While it is possible to install a water heater yourself, it is recommended to hire a professional plumber for safety and proper installation. Water heaters involve gas, electricity, and plumbing connections, which require expertise to ensure correct installation and to comply with building codes.
3. How long does it take to install a water heater?
The duration of water heater installation can vary depending on factors such as the type of water heater, existing connections, and any necessary modifications. On average, a professional plumber can complete the installation in a few hours. However, it may take longer if additional work or repairs are required.
Similar posts:
 Steps for Taking Off a Tile Backsplash
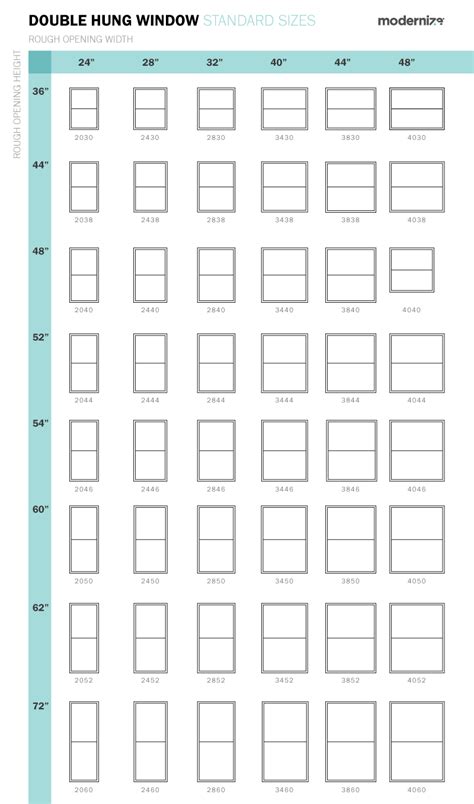 What Are Standard Window Sizes? A Comprehensive Guide
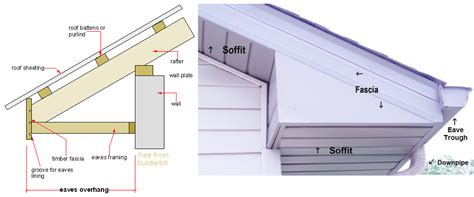 What You Need to Know About Your Eaves: A Complete Guide
 Snapdragons: The Ultimate Plant Care and Growing Guide for Stunning Blooms
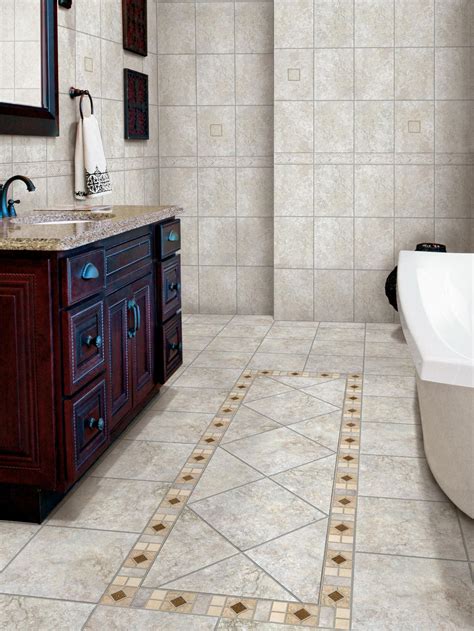 How to Tile a Bathroom Floor – A Step-by-Step Guide
 How to Replace Garage Door Springs: Torsion and Extension