
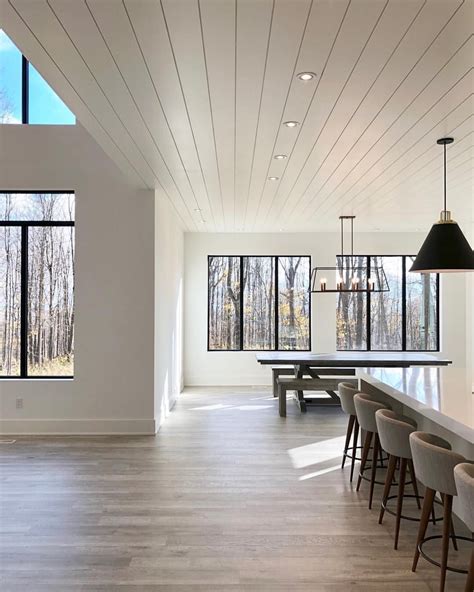
If you’re looking to add a touch of rustic charm or coastal elegance to your home, installing shiplap on a ceiling can be a fantastic option. Shiplap, with its distinctive overlapping boards, adds texture and visual interest to any space. In this comprehensive guide, we will walk you through the process of installing shiplap on a ceiling, including different methods, types of shiplap, safety considerations, and expert tips.
Why Install a Shiplap Ceiling?
Shiplap ceilings offer several advantages:
- Aesthetic Appeal: Shiplap adds a timeless and classic look to any room. It brings warmth and character, making the space feel cozy and inviting.
- Textural Interest: The horizontal lines and overlapping boards of shiplap create a visually appealing pattern that adds depth and dimension to the ceiling.
- Light Reflection: Shiplap ceilings can help distribute light more evenly throughout the room, making it feel brighter and more spacious.
- Camouflaging Imperfections: If your ceiling has imperfections or uneven surfaces, shiplap can be an excellent way to cover them up and create a smooth, uniform appearance.
Before You Begin
Before diving into the installation process, there are a few important considerations:
- Materials: Gather all the necessary materials, including shiplap boards, furring strips (if applicable), measuring tape, circular saw, level, nail gun or screws, and safety equipment.
- Preparation: Clear the room of furniture and cover the floors with protective materials. This will prevent any damage or mess during the installation process.
- Acclimation: Allow the shiplap boards to acclimate to the room’s temperature and humidity for at least 48 hours. This helps prevent warping or shrinkage after installation.
Shiplap Directly on Ceiling
If your ceiling is in good condition and you want a straightforward installation, you can attach the shiplap boards directly to the ceiling surface. Follow these steps:
- Remove Obstructions: Clear the ceiling of any light fixtures, fans, or other obstructions.
- Determine Location of Joists: Use a stud finder to locate the ceiling joists. Mark their positions with a pencil.
- Snap Chalk Lines: Create chalk lines on the ceiling to guide the installation. These lines will ensure that the shiplap boards are installed straight and level.
- Attach Shiplap Boards: Starting from one end, use a nail gun or screws to attach the shiplap boards to the ceiling, following the chalk lines. Ensure each board is securely fastened.
- Cut Around Openings or Obstructions: If there are openings for light fixtures or vents, measure and cut the shiplap boards accordingly to fit around them.
- Measure and Cut Last Shiplap Board: At the end of the ceiling, measure the remaining space and cut the last shiplap board to fit.
- Attach Last Shiplap Board: Secure the last board in place to complete the installation.
Shiplap With Furring Strips
If your ceiling has uneven surfaces or you prefer a more substantial installation method, you can use furring strips as an additional support structure. Follow these steps:
- Remove Obstructions: Clear the ceiling of any light fixtures, fans, or other obstructions.
- Determine Location of Joists: Use a stud finder to locate the ceiling joists. Mark their positions with a pencil.
- Snap Chalk Lines: Create chalk lines on the ceiling to guide the installation. These lines will ensure that the furring strips and shiplap boards are installed straight and level.
- Attach Furring Strips (Optional): Install furring strips perpendicular to the ceiling joists, using screws or nails. These strips will provide a solid base for attaching the shiplap boards.
- Cut Starter Board: Cut the first shiplap board to the appropriate length and width to fit against the wall.
- Attach Starter Board: Use a nail gun or screws to attach the starter board to the furring strip or directly to the ceiling if furring strips are not used.
- Attach Remaining Shiplap Boards: Install the remaining shiplap boards, overlapping the tongues and grooves, and secure them to the furring strips.
- Cut Around Openings or Obstructions: Measure and cut the shiplap boards to fit around any openings or obstructions.
- Measure and Cut Last Shiplap Board: At the end of the ceiling, measure the remaining space and cut the last shiplap board to fit.
- Attach Last Shiplap Board: Secure the last board in place to complete the installation.
Types of Shiplap
Shiplap is available in various materials and finishes. Here are some popular options:
- Wood Shiplap: The most traditional and common type of shiplap is made from real wood, such as pine, cedar, or fir. Wood shiplap offers natural beauty and can be painted or stained to match your desired aesthetic.
- MDF Shiplap: Medium-density fiberboard (MDF) shiplap is an affordable alternative to wood. It is engineered from wood fibers and offers a smooth, consistent surface for painting.
- Vinyl Shiplap: Vinyl shiplap is a durable and moisture-resistant option. It is low maintenance and comes in a variety of colors and textures.
Other Safety Considerations
When installing shiplap on a ceiling, it’s important to prioritize safety. Here are a few additional considerations:
- Protective Gear: Wear safety goggles, a dust mask, and gloves to safeguard yourself from dust and potential injuries while cutting and installing the shiplap.
- Power Tools: Follow the manufacturer’s instructions when operating power tools, and be cautious when handling sharp blades or fasteners.
- < strong>Electrical Safety: If you encounter electrical wiring during the installation process, turn off the power to the affected area before proceeding. If unsure, consult a licensed electrician.
Tips for Installing Shiplap on a Ceiling
Consider these expert tips to ensure a successful shiplap ceiling installation:
- Measure Twice: Take accurate measurements before cutting any shiplap boards to minimize waste and ensure a precise fit.
- Secure Properly: Use the appropriate nails, screws, or adhesive recommended for the type of shiplap and installation method you choose. This will ensure a secure and long-lasting installation.
- Allow for Expansion: Leave a small gap between the shiplap boards and the walls or other fixed objects to allow for expansion and contraction due to temperature and humidity changes.
- Finishing Touches: Fill any nail holes or gaps between boards with wood filler, and sand the surface if desired, before applying paint or stain.
Cost to Install Shiplap on Ceilings
The cost of installing shiplap on a ceiling can vary depending on factors such as the type of shiplap, the size of the area, and whether professional installation is required. On average, homeowners can expect to spend between $5 and $15 per square foot for materials and labor.
When to Call a Professional
While installing shiplap on a ceiling can be a rewarding DIY project, certain circumstances may warrant professional assistance:
- If your ceiling requires extensive repairs or modifications before installing shiplap.
- If you are not comfortable working with power tools or have limited DIY experience.
- If you have specific design requirements or complex architectural features.
FAQs (Frequently Asked Questions)
1. Can shiplap be installed on a popcorn ceiling?
It is possible to install shiplap over a popcorn ceiling, but it requires additional preparation. The popcorn texture should be removed first, ensuring a smooth and even surface for the shiplap installation.
2. Can shiplap be installed in bathrooms or other high-humidity areas?
Yes, shiplap can be installed in bathrooms and other high-humidity areas. However, it is essential to choose moisture-resistant materials such as vinyl or specially treated wood shiplap. Proper ventilation is also crucial to prevent moisture buildup.
3. Can shiplap be installed over drywall?
Yes, shiplap can be installed directly over drywall. However, ensure that the drywall is in good condition and securely fastened to the ceiling. If there are any issues with the drywall, they should be addressed before installing the shiplap.
Conclusion
Installing shiplap on a ceiling can transform the look and feel of any room, adding character and a touch of rustic elegance. By following the steps outlined in this guide and considering the different installation methods, types of shiplap, and safety considerations, you can successfully complete this DIY project and enjoy the beautiful results for years to come.
Similar posts:
 Methods for Checking Hard Water Levels
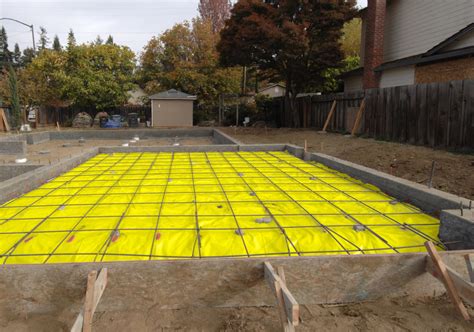 Crawl Space Vapor Barriers: Why You Need One & How to Install It
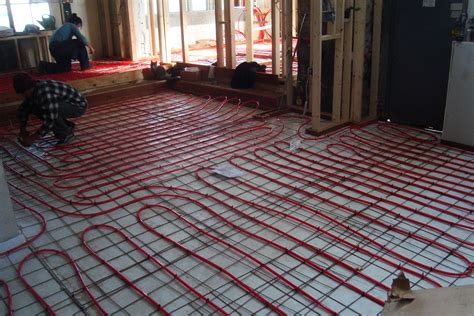 Electric Radiant Floor Heating: The Basics
 Steps for Sowing Grass Seed on an Established Lawn
 What is the expense involved in replacing a garbage disposal unit?
 The Basics of Roof Replacement: Cost, Materials, and Process