
Introduction
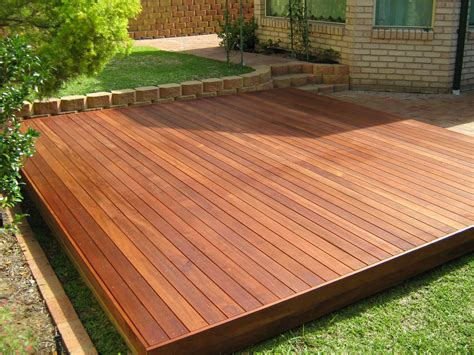
Building a floating deck is a fantastic way to create an outdoor space for relaxation and entertainment. Unlike traditional decks, floating decks are not attached to a house and “float” above the ground, making them a versatile and DIY-friendly option. In this comprehensive guide, we will take you through the step-by-step process of building a floating deck, ensuring that you have all the information you need to tackle this project with confidence.
Codes and Regulations
Before embarking on any construction project, it’s crucial to familiarize yourself with the local building codes and regulations. These codes ensure the safety and stability of your deck. Check with your local building department to obtain the necessary permits and guidelines for constructing a floating deck in your area.
Prepare the Deck Area
Preparing the deck area is an essential first step to ensure a solid foundation for your floating deck. Follow these steps:
- Clear the area of any vegetation, rocks, or debris.
- Use a measuring tape and stakes to outline the desired shape and size of your deck.
- Excavate the area to a depth of approximately 6 inches. This will allow space for gravel and provide stability to your deck.
Set the Concrete Blocks
Concrete blocks will serve as the support system for your floating deck. Here’s how to set them:
- Place concrete blocks at regular intervals along the perimeter of your deck area. Make sure they are level and properly aligned.
- Add additional blocks in the center for added support, ensuring they are evenly spaced.
Build the Outer Frame
The outer frame will provide the structure and shape of your floating deck. Follow these steps to build it:
- Measure and cut pressure-treated lumber boards to the desired length for the outer frame.
- Attach the boards together using deck screws or galvanized nails.
- Ensure the outer frame is square by measuring the diagonals. Adjust if necessary.
Position and Square the Deck Frame
Positioning and squaring the deck frame accurately is crucial for a stable and level deck. Follow these steps:
- Place the deck frame on top of the concrete blocks, ensuring it is centered and aligned with your desired deck area.
- Use a level to ensure the frame is horizontal and adjust the blocks as needed.
- Measure the diagonals of the frame to ensure it is square. Make any necessary adjustments.
Check the Blocks
Double-checking the stability and alignment of the blocks is important before proceeding. Take the following steps:
- Verify that all concrete blocks are level and properly aligned.
- Check for any wobbling or instability. Make adjustments or add shims as necessary.
Install the Remaining Joists
Joists provide additional support to your deck structure. Follow these steps to install them:
- Measure and cut pressure-treated lumber boards to the desired length for the joists.
- Attach the joists to the inner frame, spacing them evenly
. Use joist hangers or screws for secure attachment.
Install the Deck Boards
The final step is to install the deck boards, creating the surface of your floating deck:
- Measure and cut pressure-treated deck boards to the desired length.
- Start at one end and align the boards with the outer frame. Leave a small gap between each board to allow for expansion.
- Secure the deck boards to the joists using deck screws.
Tips for Building a Floating Deck
Here are some additional tips to keep in mind during the construction process:
- Use pressure-treated lumber for all structural components to ensure durability and resistance to rot.
- Consider adding a layer of weed barrier fabric beneath the gravel to prevent weed growth.
- Apply a weather-resistant finish or stain to protect the wood and enhance its appearance.
Frequently Asked Questions
1. Can I build a floating deck on uneven ground?
Building a floating deck on uneven ground can be challenging. It’s important to create a level and stable foundation for your deck. If the ground is significantly uneven, you may need to level it using techniques such as adding additional soil or using retaining walls.
2. Do I need a permit to build a floating deck?
The need for a permit varies depending on your local building codes and regulations. It’s best to check with your local building department to determine if a permit is required for your specific project.
3. How high should a floating deck be off the ground?
The height of a floating deck off the ground is a personal preference. However, it’s recommended to have at least a few inches of clearance to allow for proper air circulation and drainage. This will help prevent moisture buildup and potential damage to the deck structure.
Conclusion
Building a floating deck is a rewarding DIY project that can enhance your outdoor space and provide a versatile area for relaxation and entertainment. By following the step-by-step guide outlined in this article, you can successfully construct a floating deck that meets your needs and complies with local regulations. Remember to prioritize safety, check for level and square measurements, and use quality materials for a durable and aesthetically pleasing result. Enjoy your new floating deck!
Similar posts:
 A Homeowner’s Guide to Water Pressure: Understanding and Troubleshooting
 The Complete Guide: How to Drain Your Home’s Plumbing System
 Eggshell vs. Semi-Gloss: Which Type of Paint Is Best Suited for Your Project?
 Everything You Need to Know About Quartz Countertops: The Durable and Eco-Friendly Choice
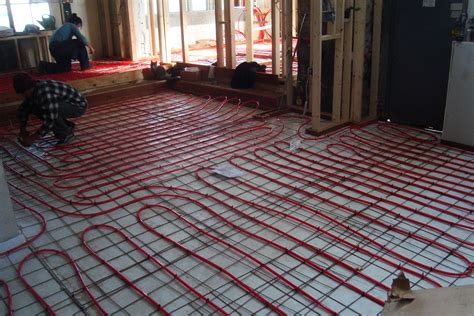 Electric Radiant Floor Heating: The Basics
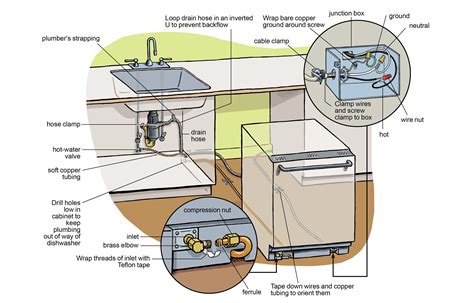 How to Install and Connect a New Dishwasher: A Step-by-Step Guide