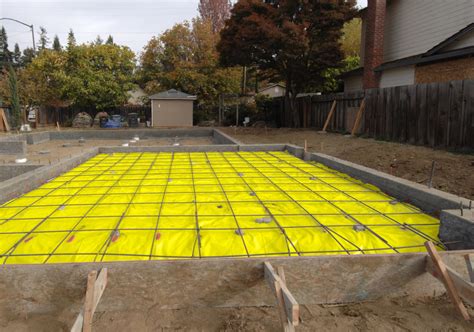
Protect Your Home with a Crawl Space Vapor Barrier
Your home’s crawl space is an often overlooked area, but it plays a crucial role in maintaining the overall health and integrity of your property. One essential component of crawl space maintenance is the installation of a vapor barrier. In this article, we will explore why you need a crawl space vapor barrier and provide a step-by-step guide on how to install one to protect your home from moisture-related issues.
The Benefits of Installing a Vapor Barrier
1. Prevention of Moisture-related Problems
Moisture is a common issue in crawl spaces, and it can lead to a range of problems if left unaddressed. By installing a vapor barrier, you create a barrier that prevents moisture from entering the crawl space. This helps to protect your home from the following issues:
2. Prevention of Mold and Mildew
Excess moisture in your crawl space creates an ideal environment for mold and mildew growth. These fungi can not only damage the structure of your home but also pose health risks to you and your family. A vapor barrier acts as a moisture barrier, reducing the likelihood of mold and mildew development.
3. Prevention of Rot
Wooden structures, such as floor joists and beams, can be susceptible to rot when exposed to excessive moisture. Over time, this can compromise the structural integrity of your home. A vapor barrier helps keep moisture at bay, protecting your crawl space and preventing rot from occurring.
4. Prevention of Rodents and Other Vermin
Moist crawl spaces can attract rodents and other pests seeking a water source. By sealing off the crawl space with a vapor barrier, you create an inhospitable environment for these unwanted guests, reducing the risk of infestation and damage to your home.
How to Install a Crawl Space Vapor Barrier
1. Locate the Crawl Space Entrance
Before you begin the installation process, locate the entrance to your crawl space. Ensure there is enough room to maneuver and work comfortably.
2. Dry out the Crawl Space
If your crawl space is damp or wet, it’s essential to dry it out before installing the vapor barrier. Use dehumidifiers, fans, or sump pumps to remove any excess moisture.
3. Clean the Crawl Space
Clear the crawl space of any debris, dirt, or objects that may obstruct the installation process. It’s important to have a clean and smooth surface for the vapor barrier.
4. Roll Out and Cut Plastic Sheets
Measure the dimensions of your crawl space and roll out the appropriate size of plastic sheeting. Cut the sheets to fit the crawl space, leaving a few extra inches on each side for overlapping.
5. Attach Sheeting to Walls and Piers
Using a staple gun or construction adhesive, attach the plastic sheeting to the walls and piers of the crawl space. Ensure a secure and tight fit, minimizing any gaps where moisture can penetrate.
6. Improve Ventilation
To promote proper airflow and reduce moisture buildup, consider improving the ventilation in your crawl space. This can be done by installing vents or fans to facilitate air circulation.
7. Vapor Barriers vs. Crawl Space Encapsulation
While a vapor barrier is effective in preventing moisture, some homeowners opt for crawl space encapsulation, which involves sealing the entire crawl
space. Crawl space encapsulation provides enhanced moisture control and insulation but requires professional assistance.
8. Other Crawl Space Water Seepage Issues
In addition to installing a vapor barrier, it’s essential to address any underlying water seepage issues in your crawl space. This may include repairing foundation cracks, installing drainage systems, or redirecting downspouts away from the foundation.
FAQs about Crawl Space Vapor Barriers
1. How long does a crawl space vapor barrier last?
With proper installation and maintenance, a crawl space vapor barrier can last anywhere from 10 to 20 years. However, factors such as environmental conditions and wear and tear may affect its lifespan.
2. Can I install a vapor barrier myself, or do I need professional help?
Installing a crawl space vapor barrier is a DIY-friendly project. However, if you have extensive moisture issues, structural concerns, or prefer professional assistance, it’s recommended to consult with a reputable contractor specializing in crawl space encapsulation.
3. Can a vapor barrier completely eliminate moisture in my crawl space?
While a vapor barrier significantly reduces moisture infiltration, it may not eliminate it entirely. It’s essential to address any underlying water seepage issues and ensure proper ventilation to maintain a dry and healthy crawl space environment.
Conclusion
Installing a crawl space vapor barrier is a proactive step in protecting your home from moisture-related problems such as mold, rot, and pests. By following the step-by-step installation guide and considering the benefits and limitations of a vapor barrier, you can create a healthier and more resilient crawl space, ensuring the long-term integrity of your home.

