
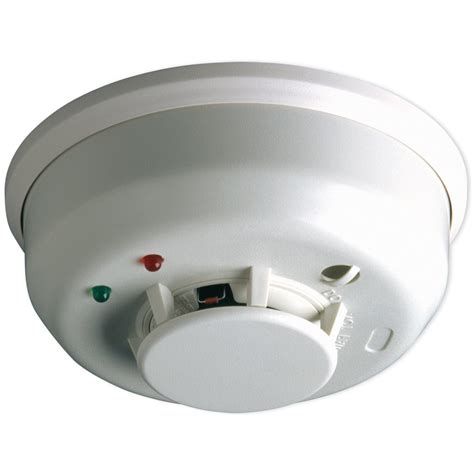
Ensuring the safety of your home and loved ones is of utmost importance, and one crucial step in achieving this is installing hardwired smoke detectors. In this comprehensive guide, we will walk you through the process of installing hardwired smoke detectors in your home. With the right tools and following the step-by-step instructions provided below, you can have a reliable smoke detection system in no time.
Before You Begin
Before diving into the installation process, keep the following points in mind:
- Read the instruction manual provided with your smoke detectors to familiarize yourself with the specific requirements and recommendations.
- Ensure that you have the necessary tools and materials, including a voltage tester, wire cutters, electrical tape, wire connectors, and a screwdriver.
- Turn off the power to the circuit you’ll be working on by switching off the corresponding circuit breaker.
How to Install Hardwired Smoke Detectors
Follow these steps to install hardwired smoke detectors in your home:
Step 1: Mark Locations for the Smoke Detector Boxes
Decide on the locations where you want to install the smoke detectors. They should be placed on each level of your home and outside sleeping areas. Use a pencil to mark the exact spots on the ceiling or wall where the electrical boxes will be installed.
Step 2: Make Cutouts
Using a drywall saw, carefully cut out holes at the marked locations for the electrical boxes. Ensure that the holes are the appropriate size for the boxes.
Step 3: Run NM Cable to the First Box
Measure and cut a length of non-metallic (NM) cable from the electrical panel to the first smoke detector box. Leave some extra cable at both ends for easier installation. Run the cable through the wall or ceiling, following the most direct route.
Step 4: Run Cables to Other Boxes
Using the same method as in Step 3, run additional NM cables from the first box to the other smoke detector boxes. Ensure that there is enough cable to reach each box comfortably.
Step 5: Insert Cables into Electrical Boxes
Insert the ends of the NM cables into the electrical boxes. Leave about 6 inches of cable inside each box to provide enough slack for connections.
Step 6: Mount the Boxes
Securely mount the electrical boxes in the cutouts you made in Step 2. Ensure that they are flush with the ceiling or wall surface and securely fastened using screws.
Step 7: Install Mounting Plates
Attach the mounting plates provided with the smoke detectors onto the electrical boxes. These plates will hold the smoke detectors in place.
Step 8: Connect the Smoke Detectors
Follow the manufacturer’s instructions to properly connect the smoke detectors to the wiring in each box. Typically, this involves connecting the black wire (hot), white wire (neutral), and green or bare wire (ground).
Step 9: Install the Backup Smoke Detector Battery
Many hardwired smoke detectors come with a backup battery to ensure functionality during power outages. Install the backup battery according to the manufacturer’s instructions.
Step 10: Connect to the Power Source
Using wire connectors, connect the wires from the smoke detectors to the corresponding wires in the electrical boxes. Ensure secure connections and use electrical tape to cover the connectors.
Step 11: Test the Smoke Detectors
Once all connections are made, restore power to the circuit by switching on the circuit breaker. Test each smoke detector by pressing the test button. If the detectors sound the alarm, it means they are functioning correctly.
When to Call a Professional
While installing hardwired smoke detectors can be a DIY project, there are certain situations when it’s best to call a professional electrician:
- If you’re not comfortable working with electrical wiring or lack the necessary experience.
- If your home has complex wiring configurations that require professional expertise.
- If you’re unsure about local building codes and regulations regarding smoke detector installation.
Frequently Asked Questions (FAQ)
Q: Do I need to install hardwired smoke detectors in my home?
A: Installing hardwired smoke detectors is highly recommended for optimal safety. They provide a reliable power source and interconnectivity, ensuring that all detectors sound the alarm simultaneously in case of a fire.
Q: Can I replace my battery-operated smoke detectors with hardwired ones?
A: Yes, it is possible to replace battery-operated smoke detectors with hardwired ones. However, it may require running new electrical wiring, which could be a more complex task.
Q: How often should I test my hardwired smoke detectors?
A: It is recommended to test your hardwired smoke detectors at least once a month to ensure they are functioning properly. Additionally, replace the batteries in backup power sources as needed.
Conclusion
Installing hardwired smoke detectors is a crucial step in safeguarding your home against the dangers of fire. By following the step-by-step instructions provided in this guide, you can ensure the proper installation and functionality of your smoke detection system. Remember, if you encounter any difficulties or have concerns about working with electrical wiring, it’s best to consult a professional electrician to ensure the safety and effectiveness of your smoke detectors.
Similar posts:
 How a Furnace-Mounted Home Humidifier Works: A Comprehensive Guide
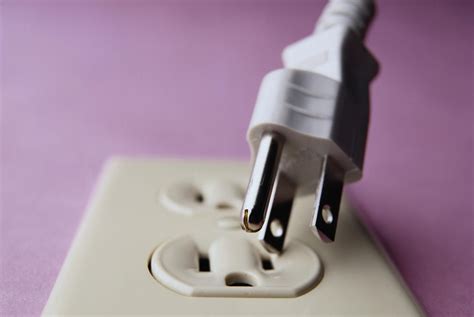 Guide to Electrical Connections in and Around the Home
 How to Replace Garage Door Springs: Torsion and Extension
 Tips for Watering Succulents
 Ways to Organize Your Closet by Color
 Steps for Replacing a Thermocouple or Flame Sensor in a Water Heater