
Bob Formisano is a certified architect and builder boasting nearly four decades of expertise in constructing new residences and renovating historic properties. He is particularly skilled in restoring outdated systems from the 1920s, such as galvanized water pipes and knob-and-tube wiring. For over a decade, he has contributed articles on home repairs.

Project Summary
- Duration: 30 minutes to 1 hour
- Duration: 30 minutes to 1 hour
- Proficiency Level: Intermediate
- Projected Expense: $10 to $30
A thermocouple, also known as a flame sensor, is a component utilized to regulate gas flow in gas-powered water heaters. In traditional heaters equipped with standing pilot lights, this component is commonly referred to as a thermocouple. In contrast, in modern units featuring electronic ignition, it is often called a flame sensor. For the sake of this discussion, we will use the term thermocouple to describe both types of devices.
The thermocouple is an integral component of the pilot burner assembly, linking to the gas control valve located on the exterior of the water heater. This straightforward device transforms the heat generated by a flame into a minor electrical current, functioning as a switch to regulate the gas flow from the supply valve. Essentially, if the thermocouple fails to detect a flame, it stops the gas valve from supplying gas to the burner. Consequently, it serves as a crucial safety feature of the water heater system.
A faulty thermocouple is frequently the reason why the pilot light of a water heater fails to ignite or why the burner goes out.
Thermocouple or Flame Detector?
The method of ignition in your water heater influences the process of thermocouple replacement. In water heaters with a standing pilot ignition, the thermocouple is directly connected to the burner assembly, which includes only the pilot and thermocouple. In contrast, water heaters with electronic ignition feature a burner assembly that includes a pilot, thermocouple, and an electronic igniter.
Prior to Starting
The initial step in servicing a water heater, whether it features electronic ignition or a standing pilot, is to disconnect the connections to the gas control valve. Begin by setting the gas control valve on the water heater to the OFF setting. Next, close the shutoff valve on the gas supply line leading to the water heater.
Warning
It is advisable to leave any tasks related to water heaters and other gas appliances to qualified professionals if you lack experience. Only proceed with this project if you possess significant expertise in handling gas appliances and have all the required skills to ensure the job is done safely and accurately.
Requirements
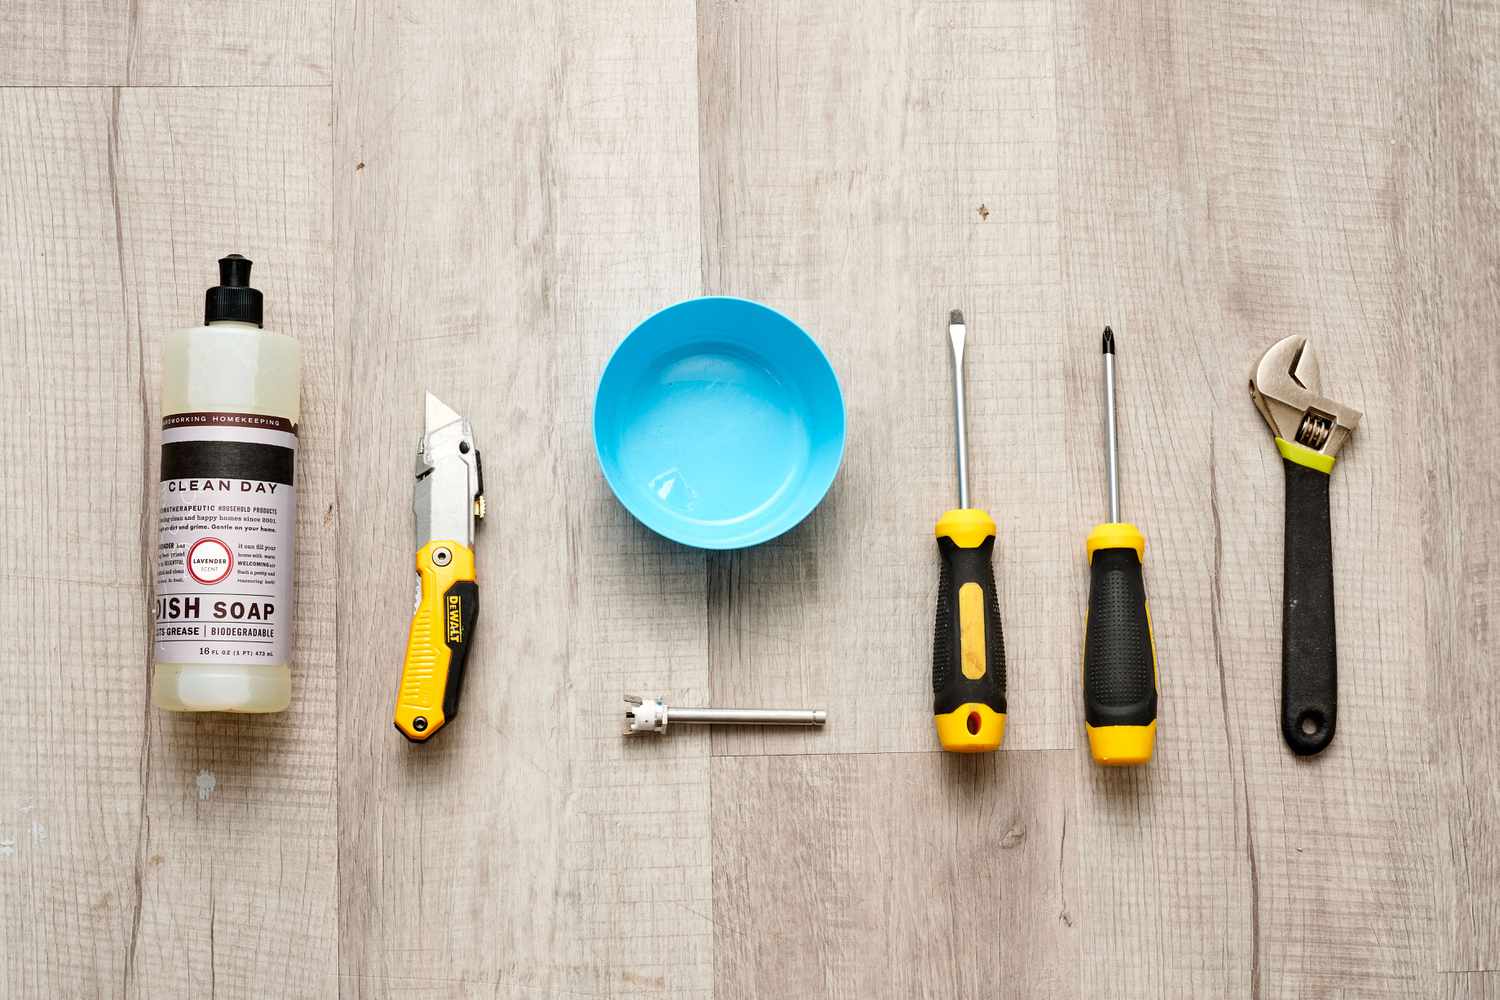
Gear / Instruments
- Adjustable spanner or crescent wrench
- Screwdrivers
- Box cutter (if necessary)
Materials
- Replacement gasket for the water heater manifold (if necessary)
- Replacement thermocouple (if necessary)
- A blend of dish soap and water
Instructions
Steps to Change the Thermocouple in a Water Heater with Electronic Ignition
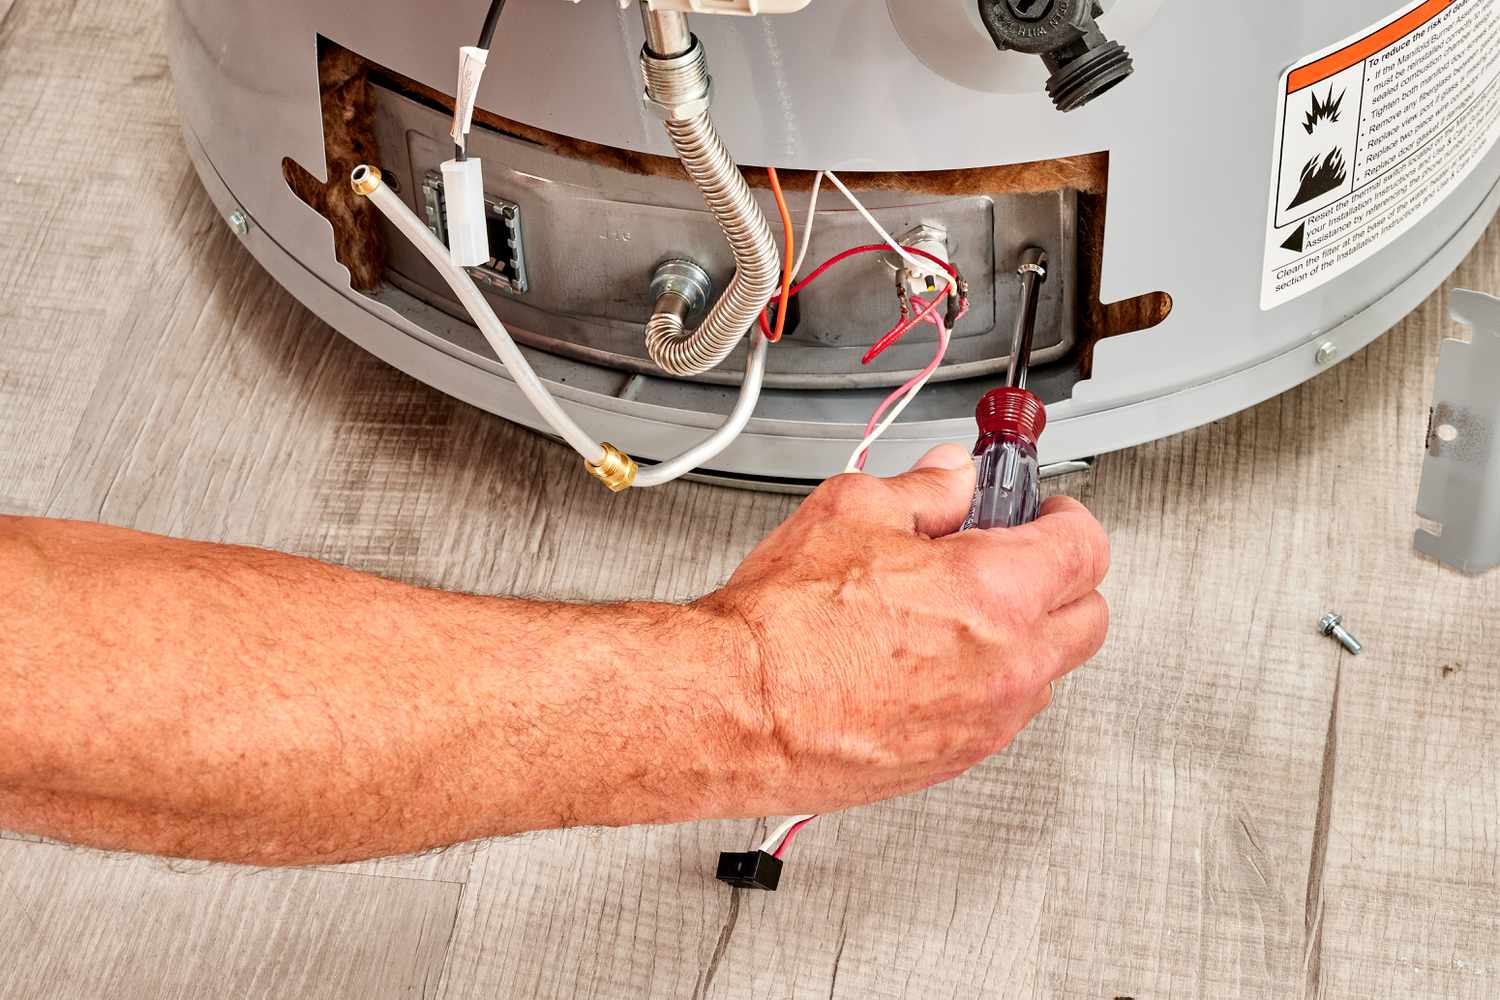
Take off the cover of the burner assembly manifold.
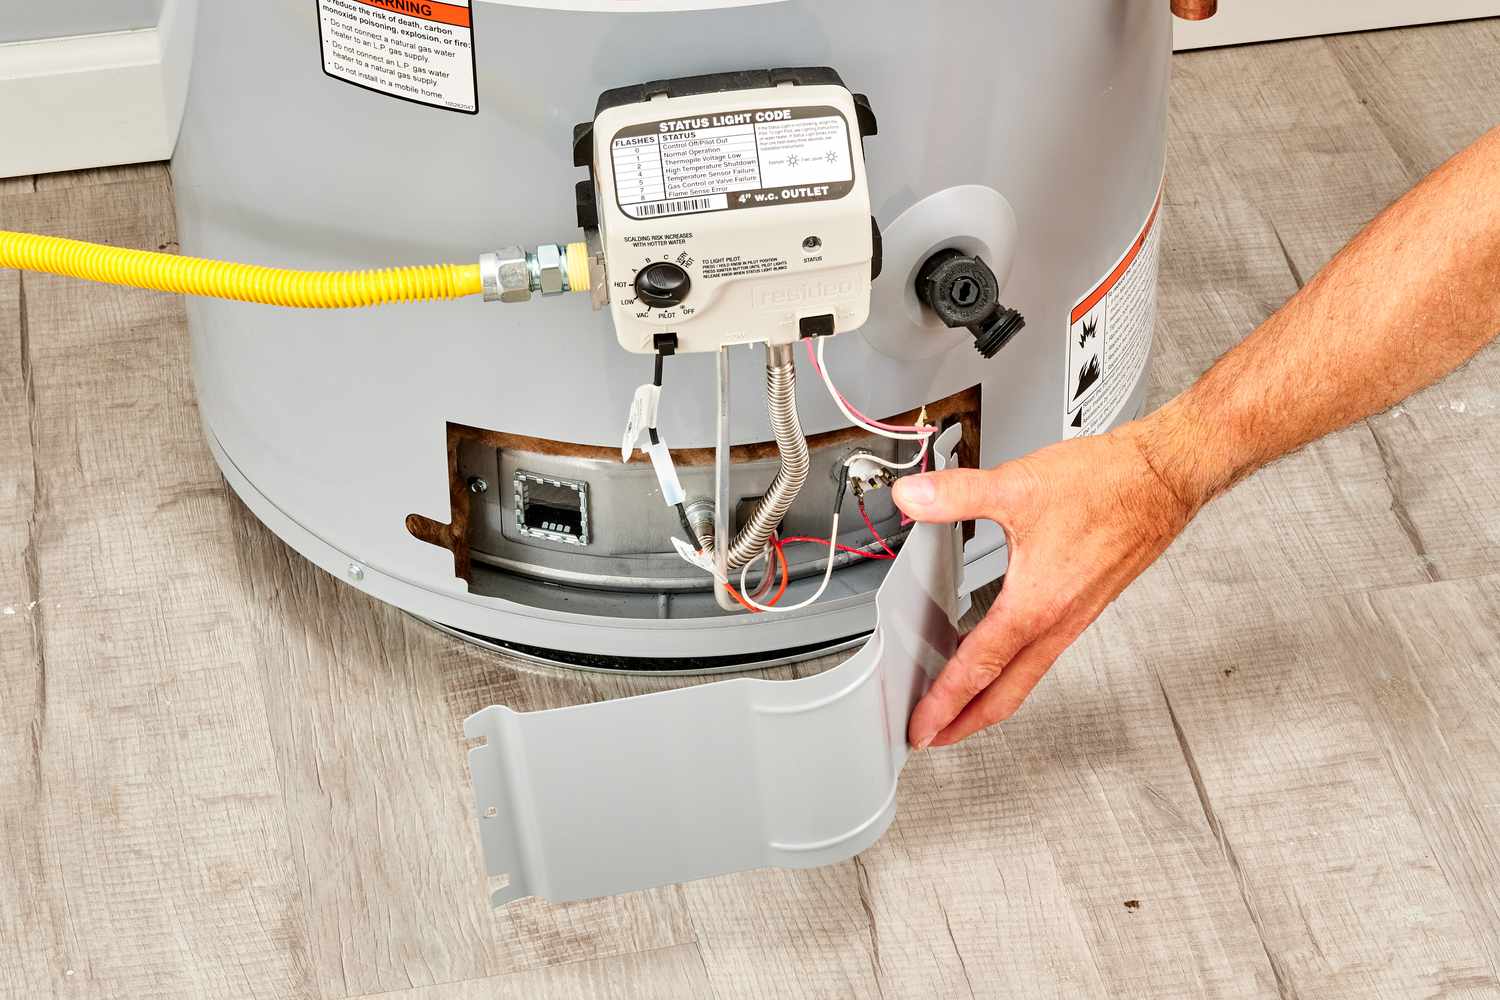
The combustion chamber in water heaters equipped with electronic ignition is located behind a gasket-sealed cover. To reach this chamber, you need to take off the cover of the burner assembly manifold, which safeguards the components including the burner supply tube, burner, electronic ignition, pilot, and thermocouple. Begin by unscrewing the fasteners that hold the burner assembly manifold cover in place. The method of securing this panel can vary by brand and model, and it may be fastened with nuts, screws, or specialized tamper-resistant fasteners, such as #20 Torx-head screws.
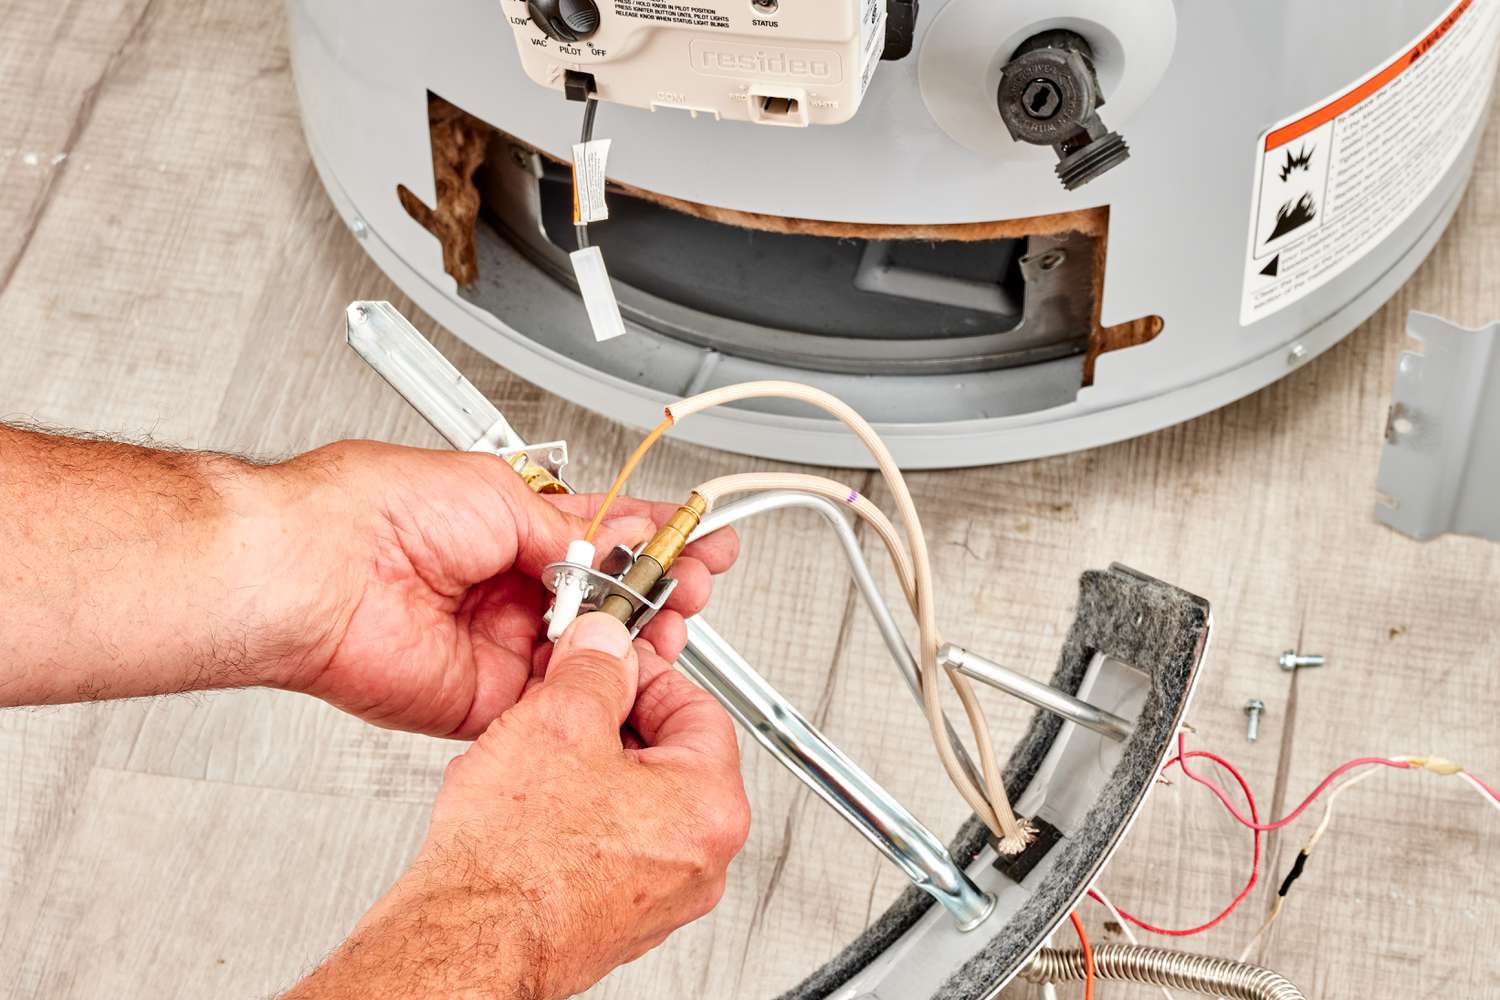
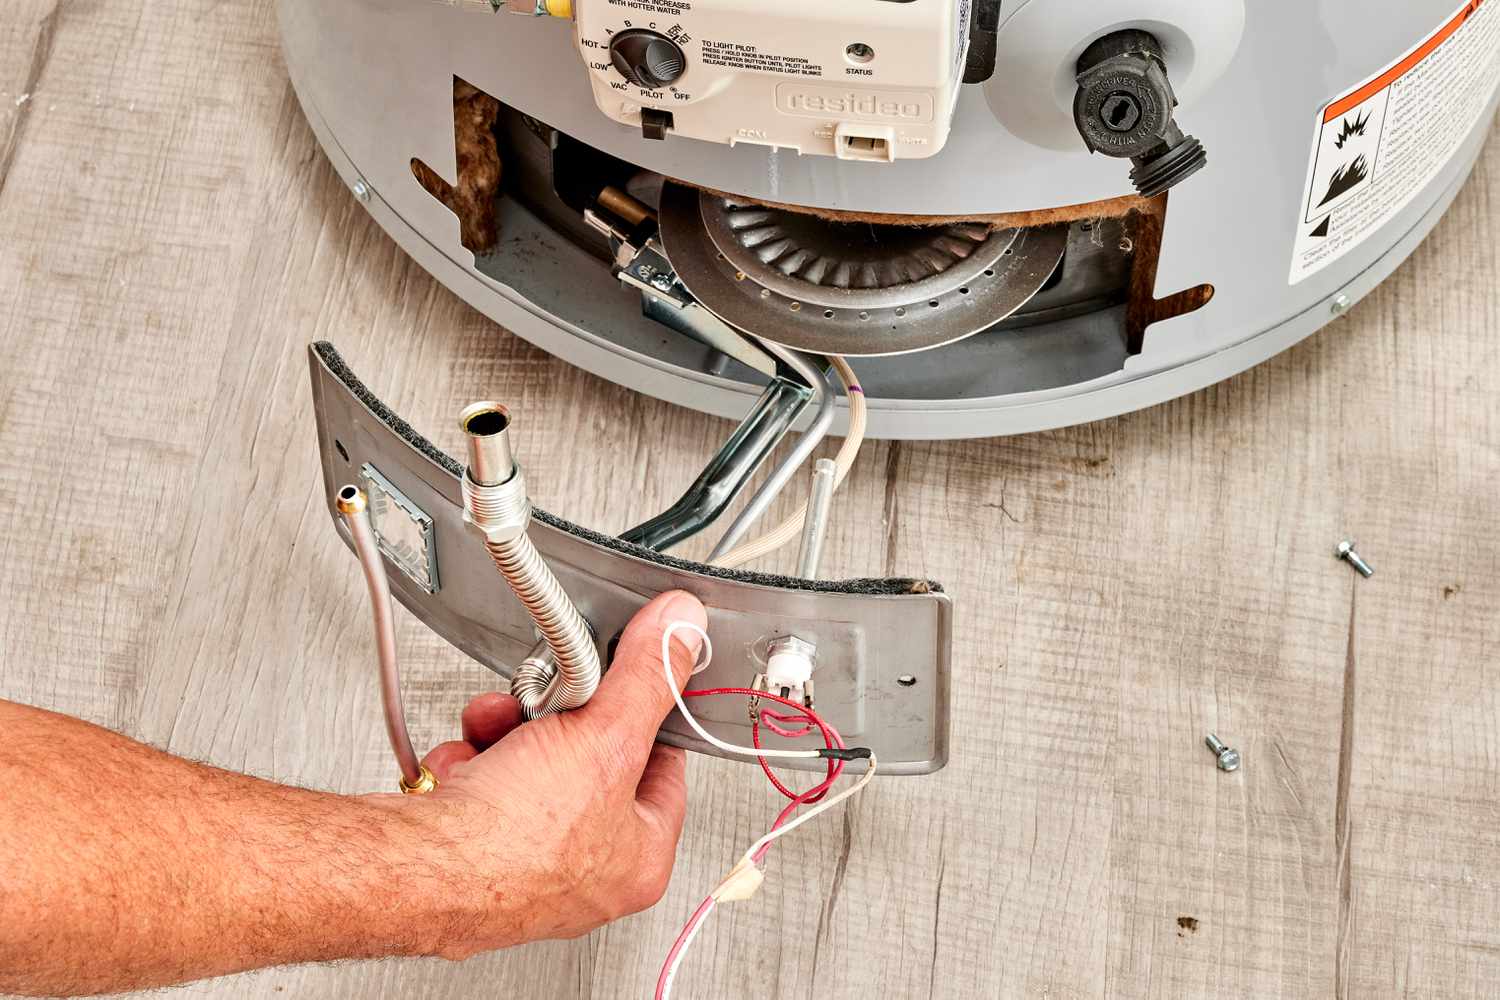
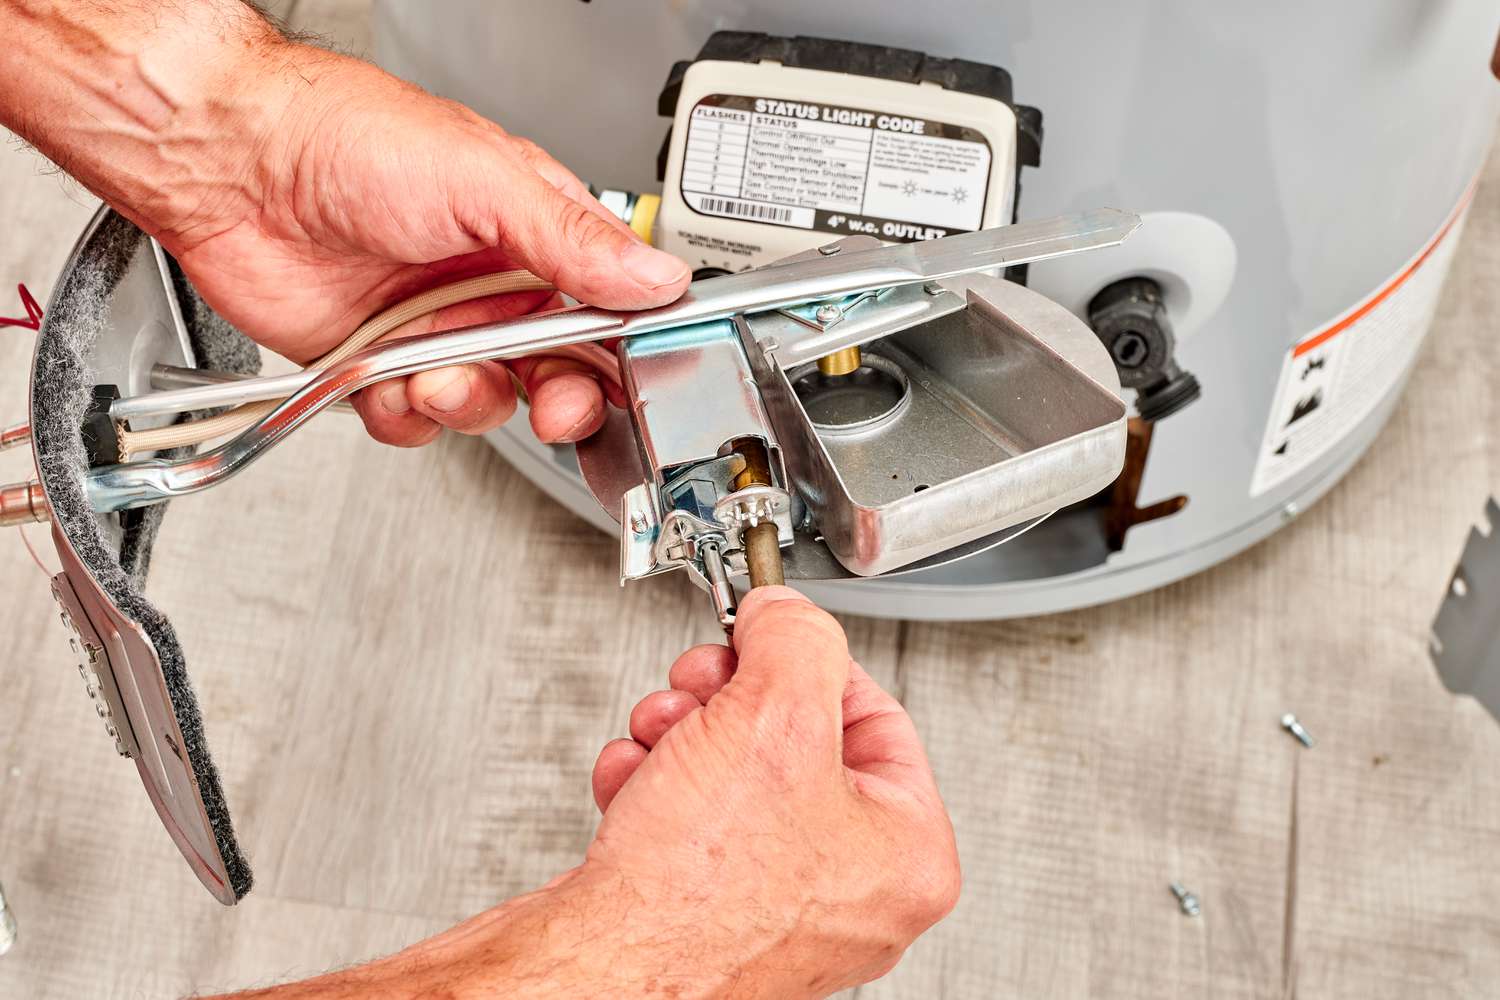
Take out the Burner Assembly.
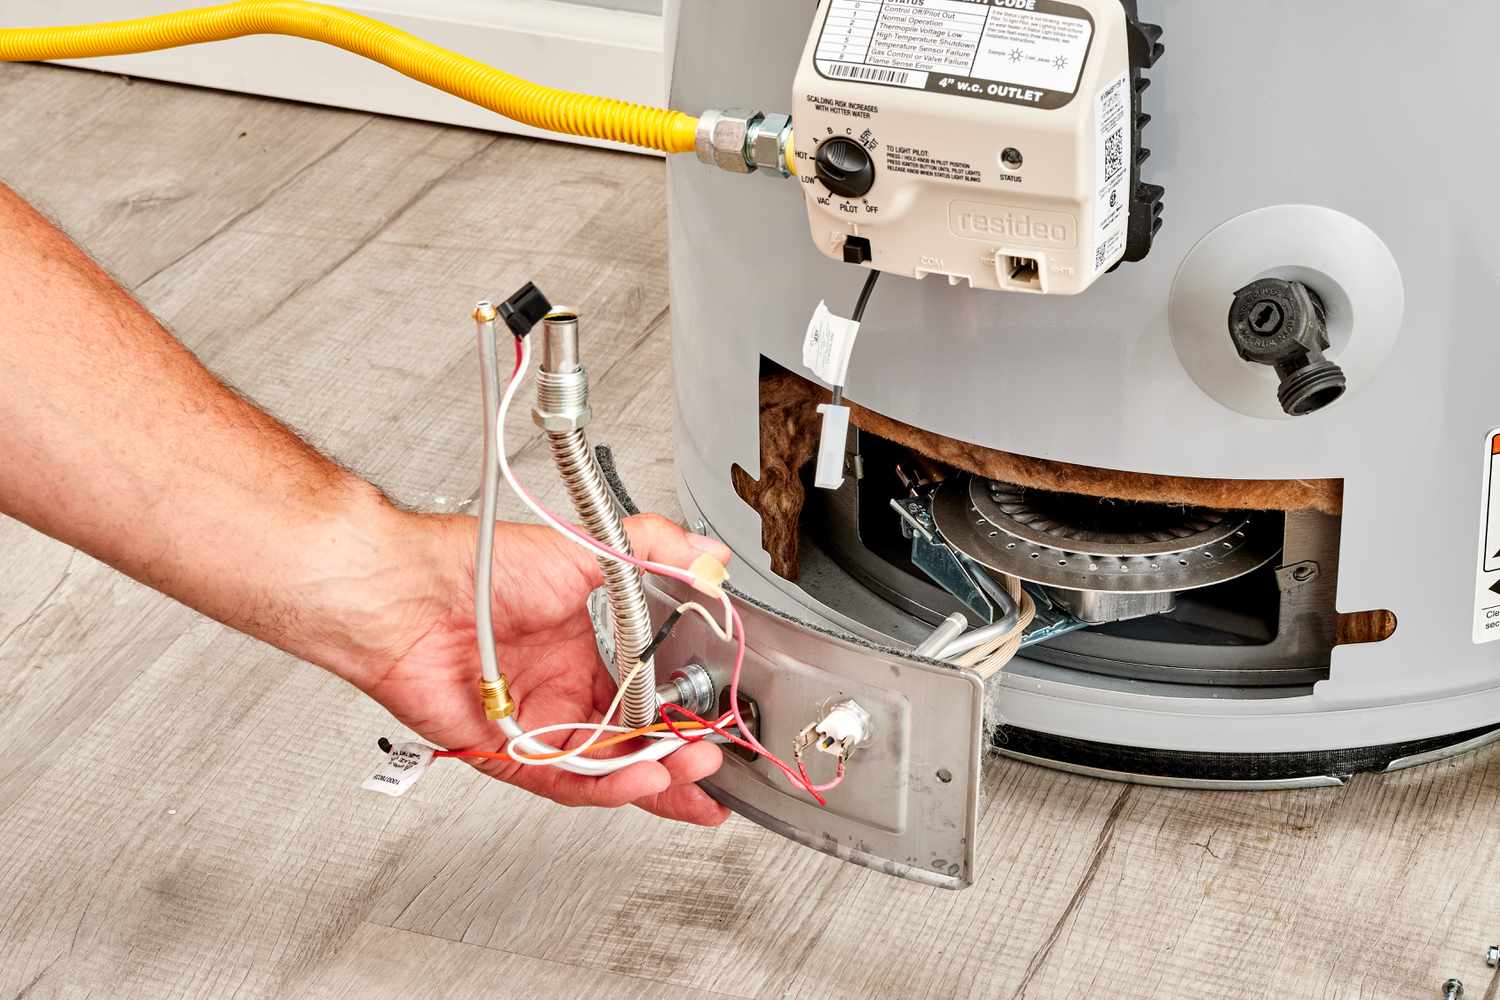
Take hold of the burner supply tube and apply a slight downward pressure to release the connections for the manifold, pilot tube, and thermocouple. Carefully detach the manifold and burner assembly from the burner combustion chamber, ensuring that the internal parts remain undamaged. If the burner resists movement, inspect the base for any screws that might be securing it in place.
Take off the gasket from the cover plate.
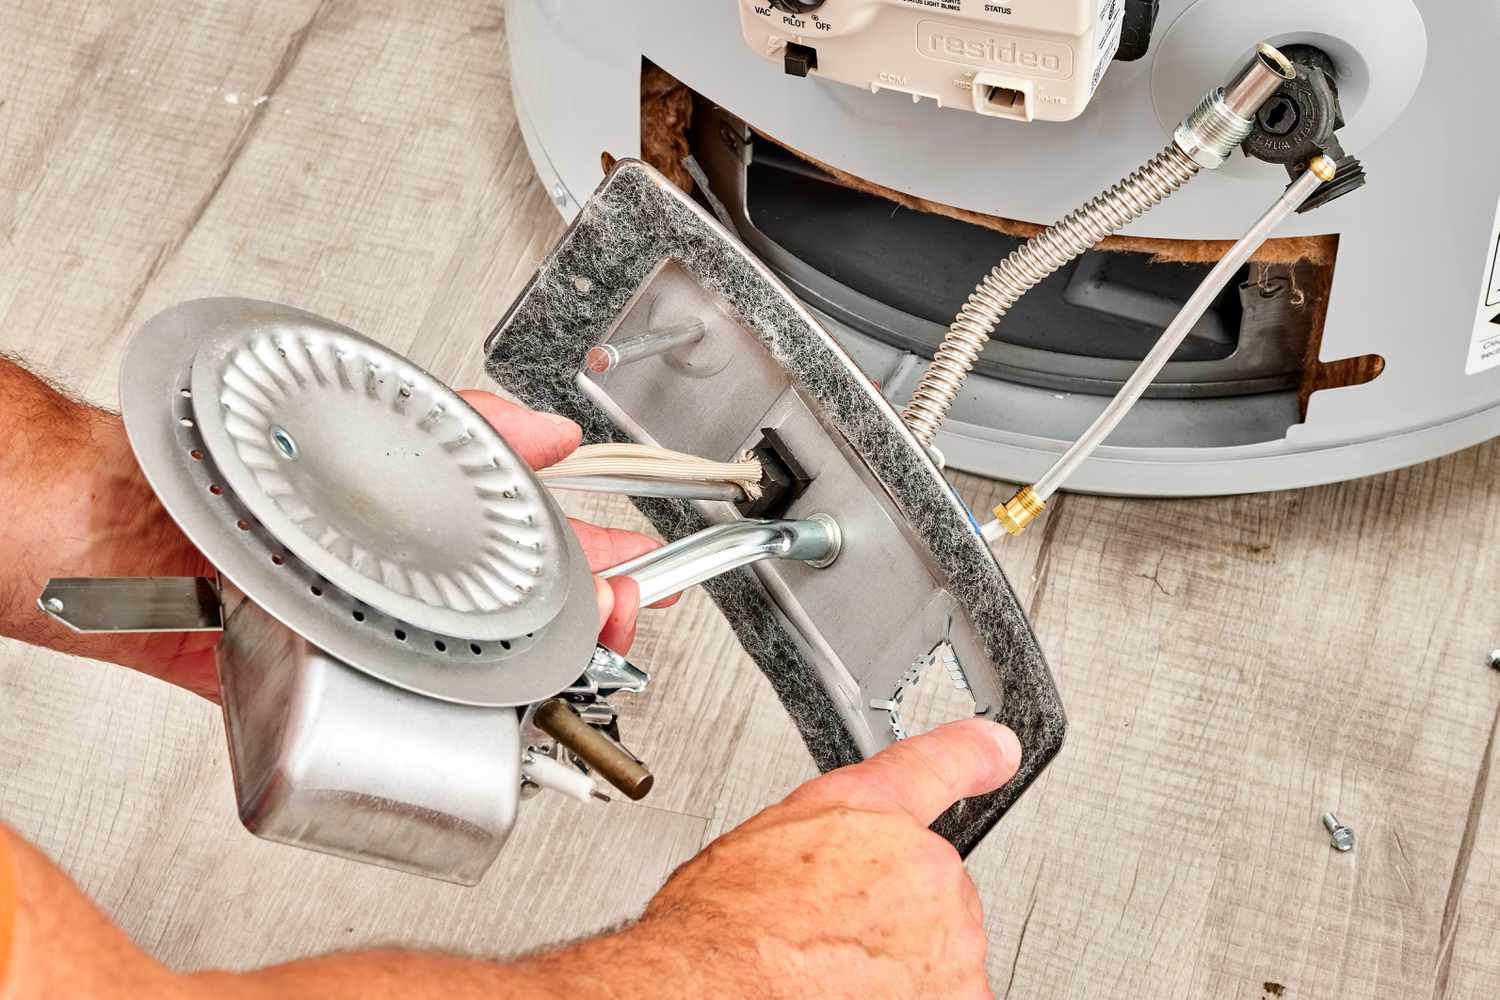
Gently detach the old gasket from the manifold cover plate if it remains in good shape and you intend to reuse it. If not, take it off and prepare to purchase a new one. Ensure to clean the metal surfaces that lie between the cover plate and the water heater.
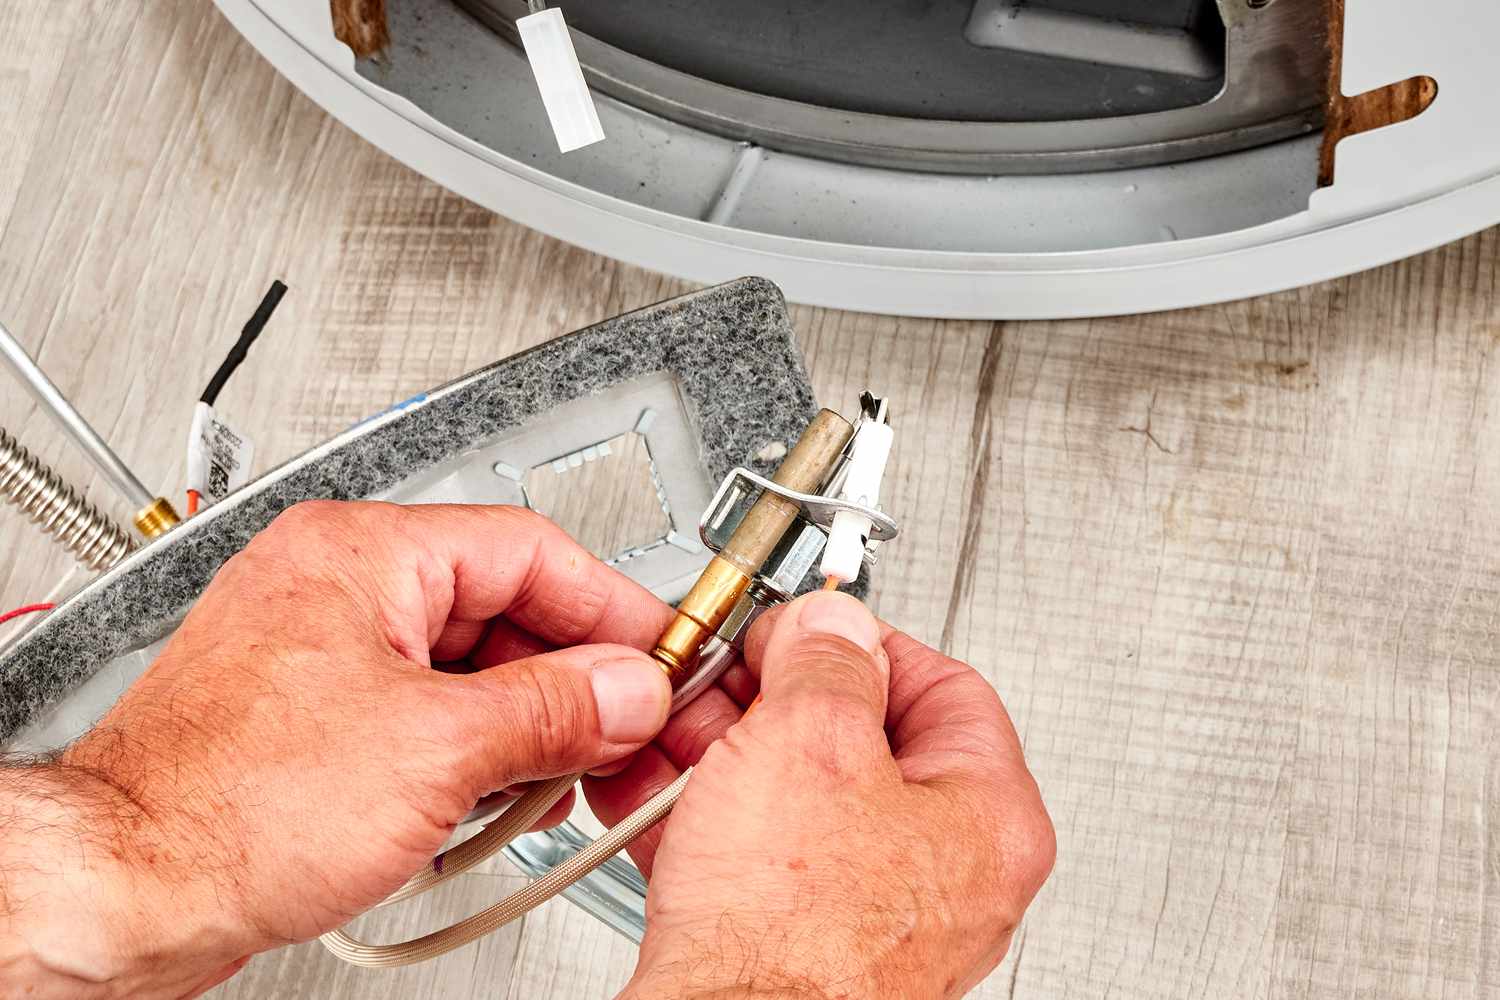
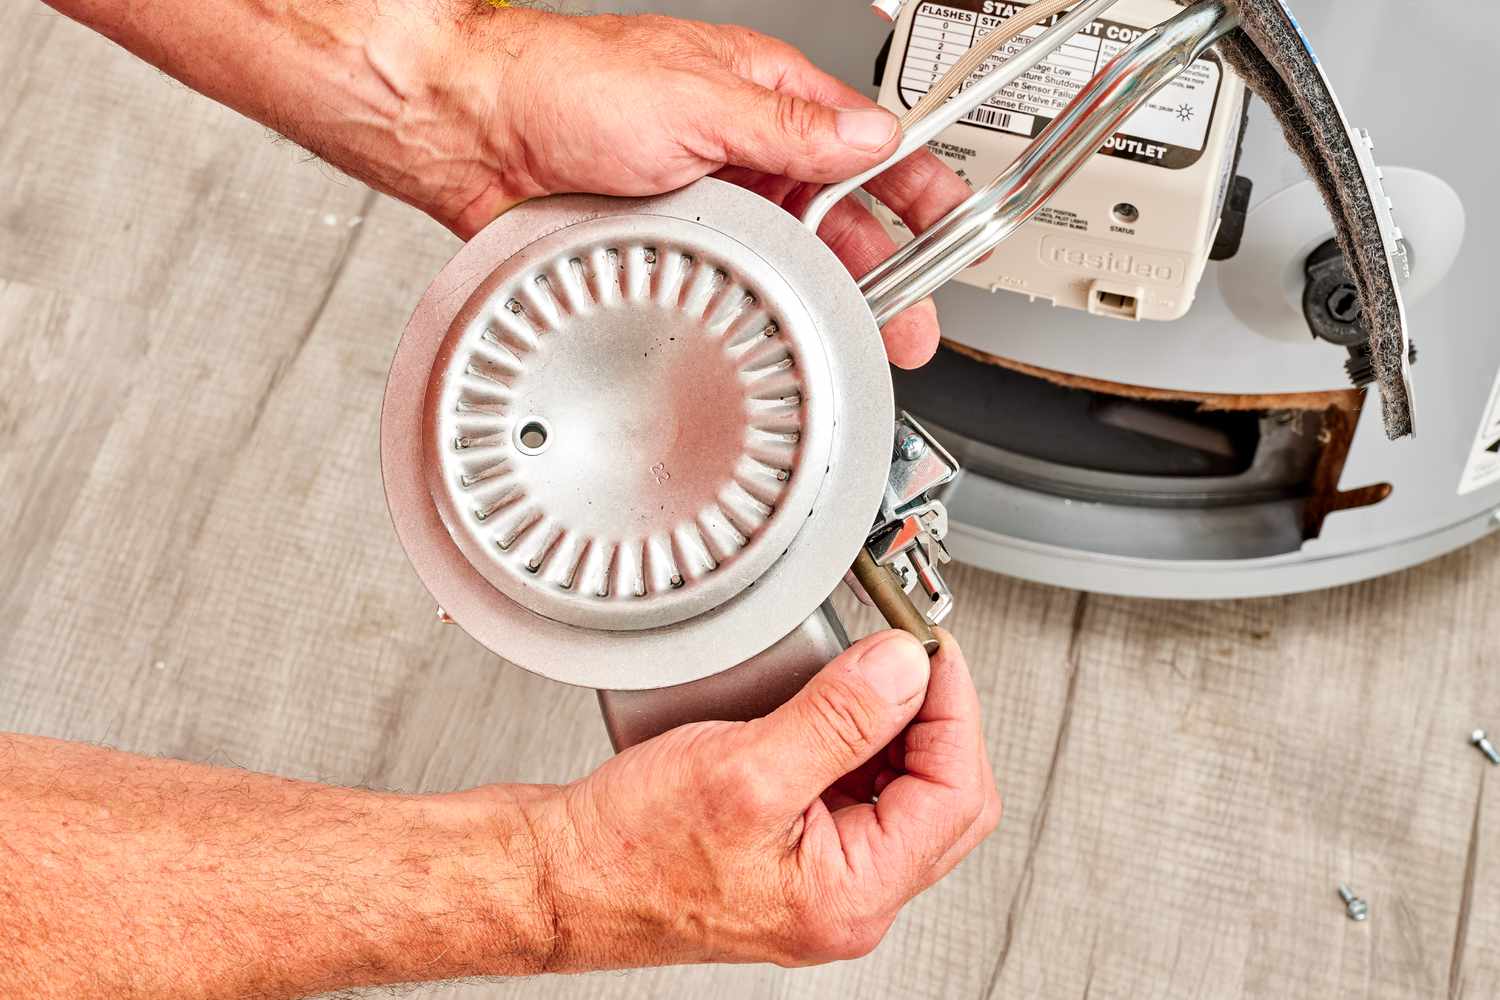
Detach the thermocouple.
Gently and steadily twist and pull the old thermocouple from its mounting bracket. It should detach without much difficulty if you apply consistent pressure. Be careful not to bend or damage the connection between the pilot and the thermocouple bracket. To fully remove the old thermocouple, pull it through the rubber grommet seal from the inside to the outside, or through the opening in the burner assembly manifold cover. If necessary, you can cut the old thermocouple to facilitate its removal.
Tip
Bring the old thermocouple to a hardware store, a home improvement center, or a plumbing supply shop to find a precise match. Additionally, purchase a new gasket for the manifold cover plate if you plan to replace the old one.
Replace the Thermocouple with a New One
Place the new thermocouple through the grommet or opening in the burner assembly manifold cover from the exterior. Slide the thermocouple into its mounting bracket until it is securely in position or audibly clicks. Adjust the thermocouple tip so that the pilot flame surrounds the upper 3/8 to 1/2 inch of the tip.
Install the Burner Assembly again.
Position the burner within the combustion chamber and ensure it is securely fitted. Either use a new gasket for the burner manifold cover or put back the old one if it is still in acceptable condition. Reattach the cover assembly, taking care not to overtighten the screws or fasteners. Lastly, reconnect the gas control valve as detailed below.
Steps to Change the Thermocouple on a Standing-Pilot Water Heater
Take out the Burner Assembly.
After detaching the pilot supply tube, burner supply tube, and thermocouple from the gas control valve, you can easily lift and take out the burner assembly from the base of the water heater.
Detach the thermocouple.
Gently and steadily pull and rotate the old thermocouple from its bracket. It should detach without much effort if you apply consistent pressure. Take care to avoid bending any components.
Replace the Thermocouple with a New One
Place the new thermocouple into the bracket from which it was taken out, ensuring it is securely fitted or clicks into position. Adjust the thermocouple tip so that the pilot flame surrounds the upper 3/8 to 1/2 inch of the tip.
Install the Burner Assembly again.
Place the burner back into the combustion chamber and ensure it is securely positioned. Reattach the gas control valve as detailed below.
Steps to Reattach the Gas Control Valve
For water heaters with electronic ignition and standing pilot systems: After installing the new thermocouple, reattach the pilot, burner, and thermocouple, along with the electronic igniter if applicable, to the gas control valve.
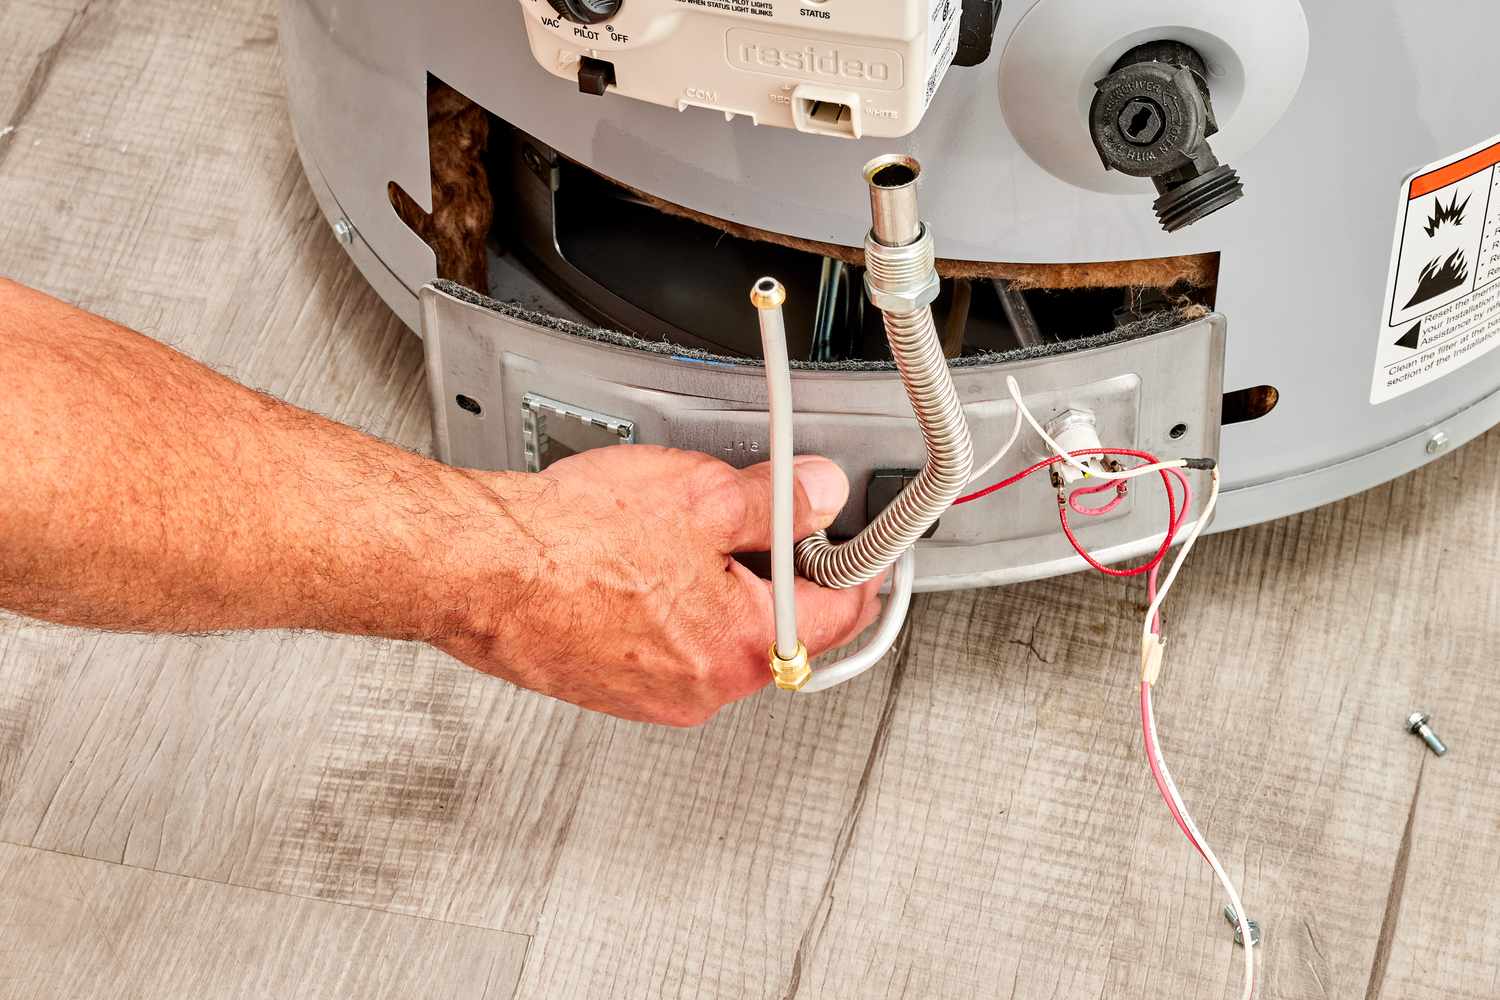
Reconnect the gas pipes.
Reattach the burner supply tube, pilot supply tube, and thermocouple to the gas control valve. Ensure that the thermocouple’s mounting nut is tightened to no more than a quarter turn past hand-tight. For units with electronic ignition, remember to reconnect the Piezo igniter as well.
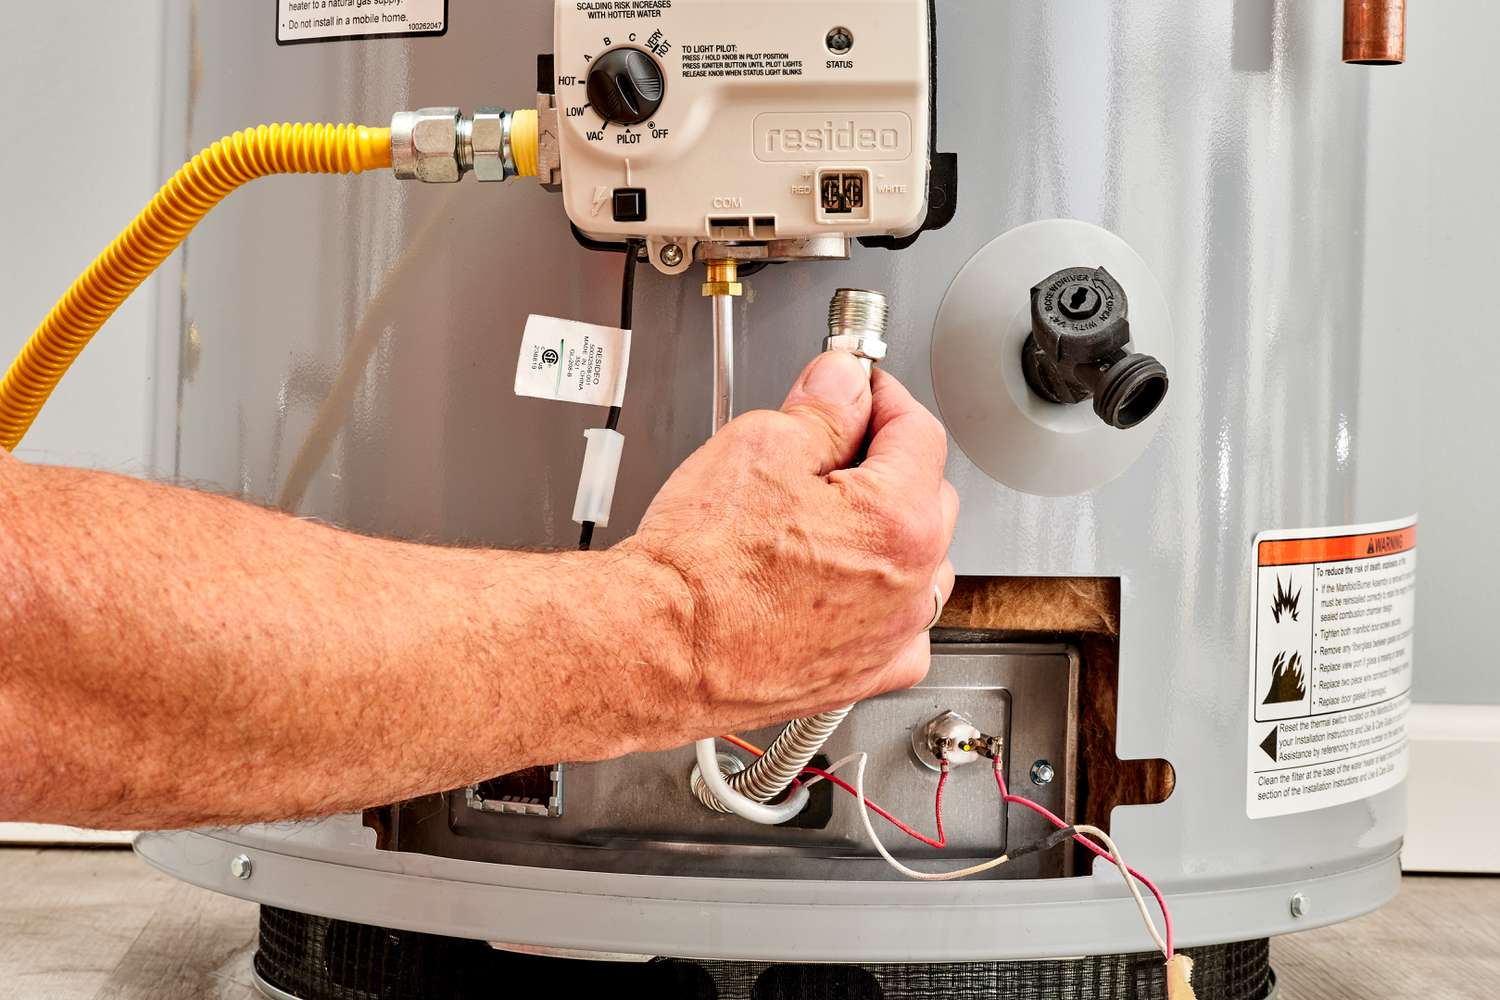
Activate the Gas Supply
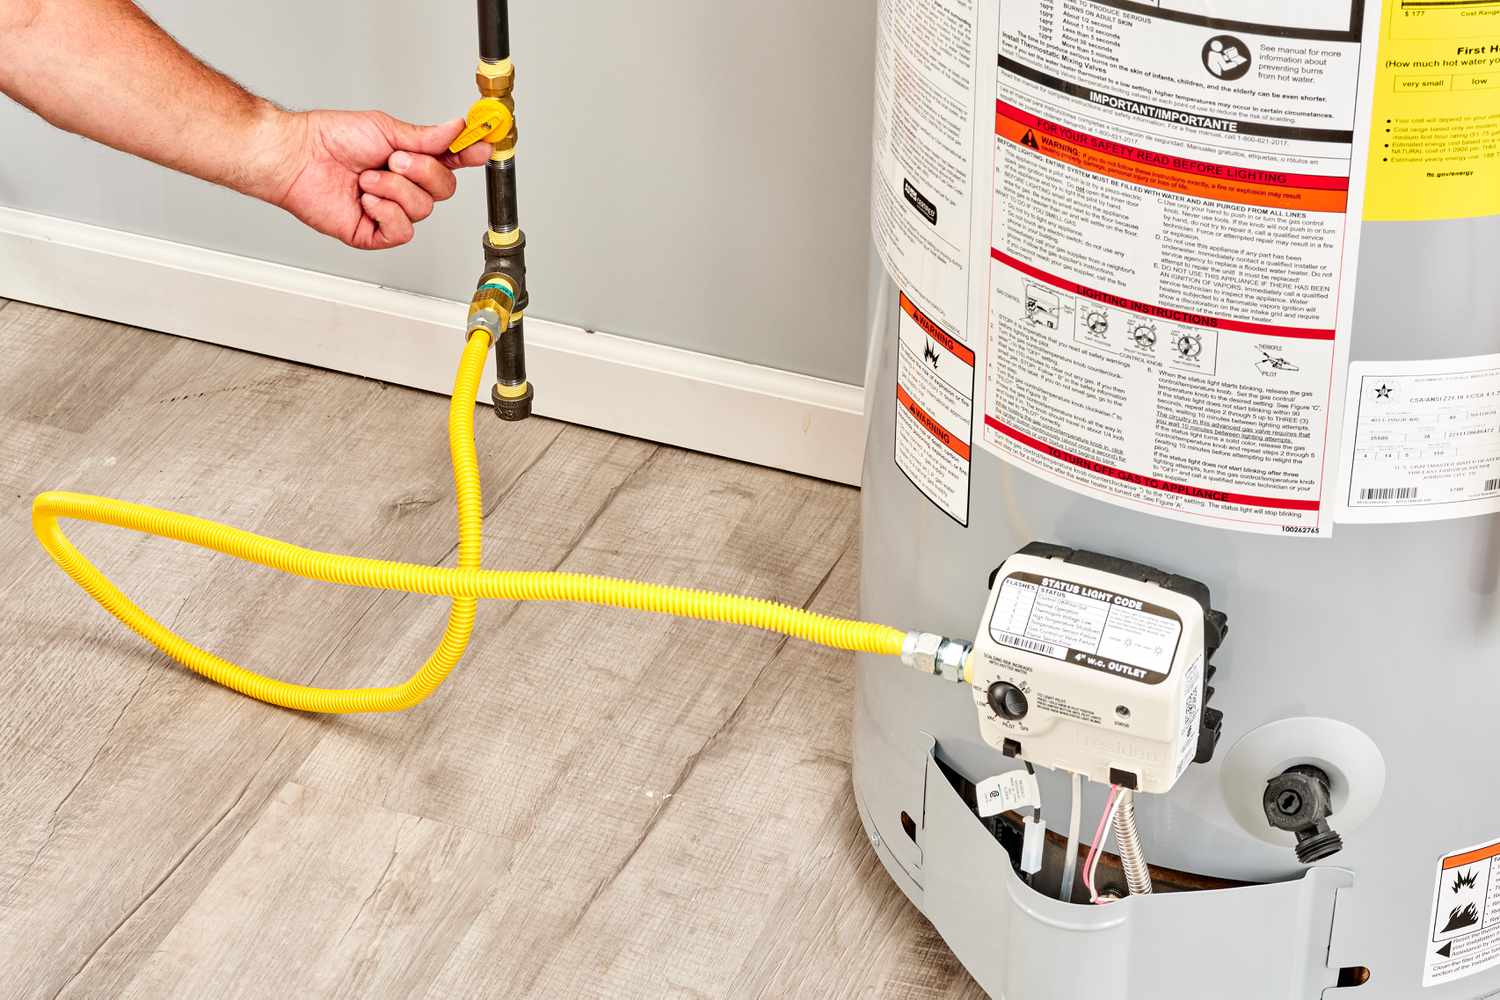
Open the gas supply line shutoff valve. Switch the gas control valve to the ON position. For units with a standing pilot, relight the pilot according to the manufacturer’s guidelines before turning the valve to ON. Adjust the water heater thermostat to the preferred temperature.
Evaluate the Water Heater
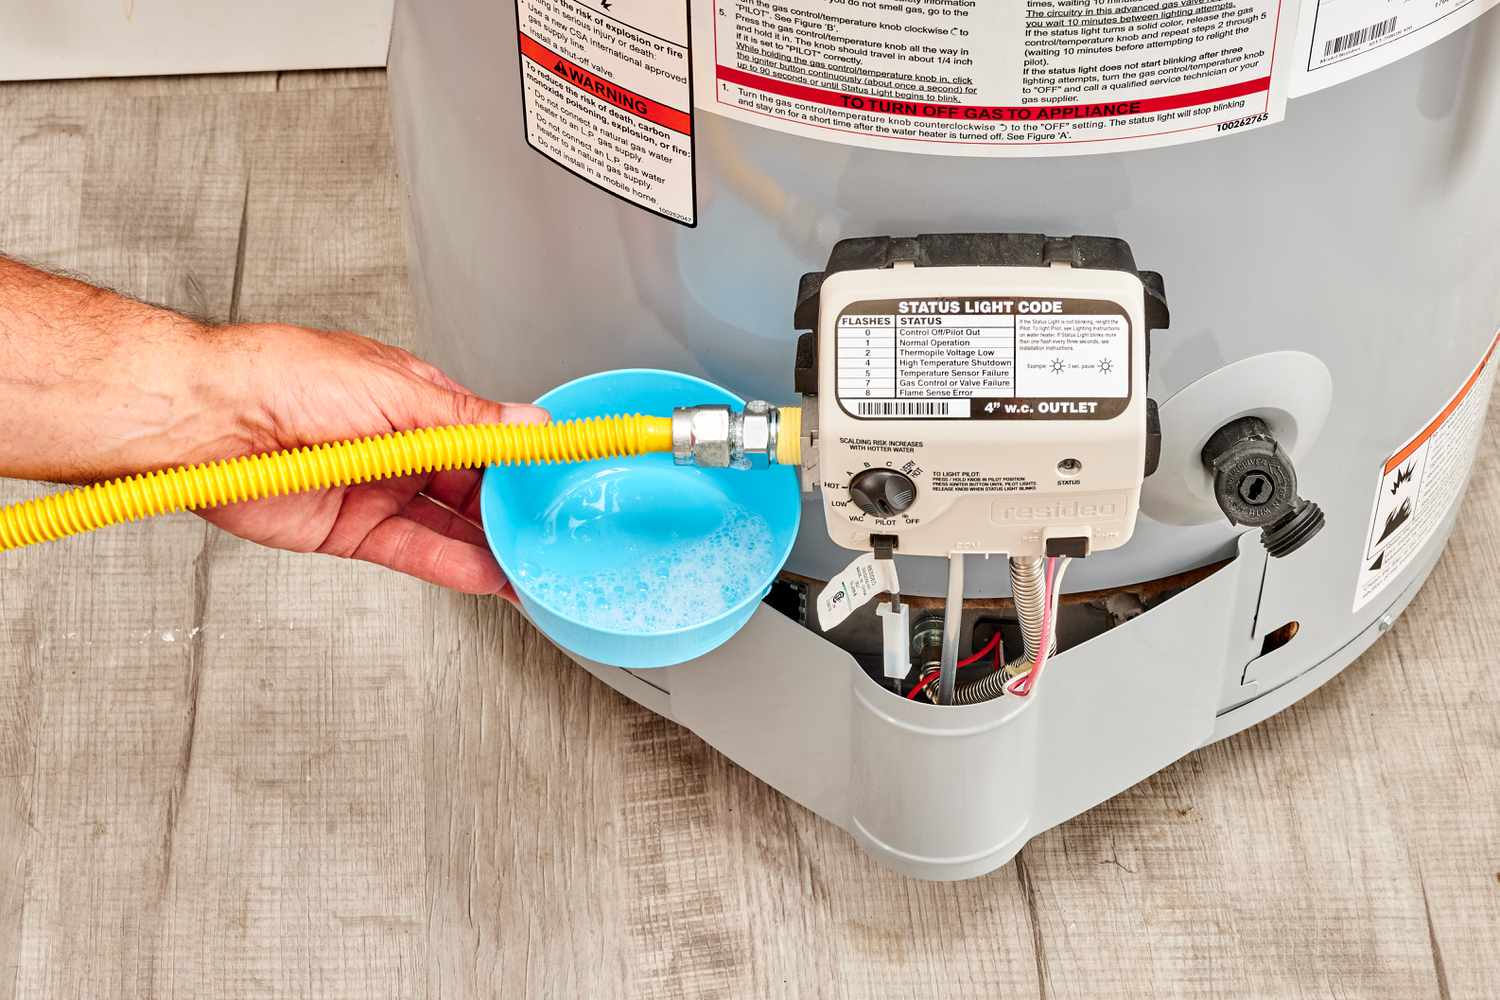
Inspect the primary supply line and the pilot supply line at the gas control valve for any gas leaks by applying a soap and water mixture. Apply the soapy solution to the fittings and observe for any bubbles that would signal a leak. Should a leak be identified, secure all gas connections and perform the soapy water test again until all leaks are eliminated.
Similar posts:
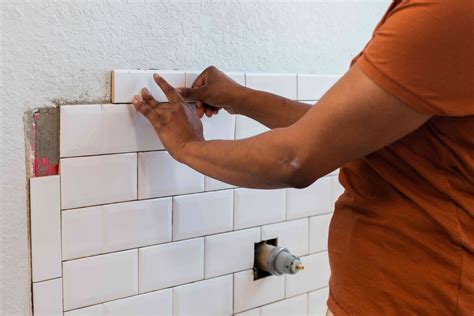 How to Install Wall Tile: A Step-by-Step Guid
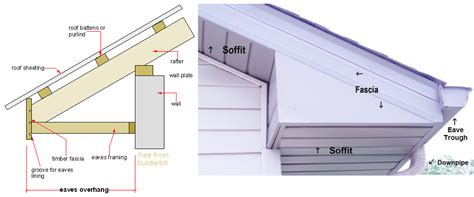 What You Need to Know About Your Eaves: A Complete Guide
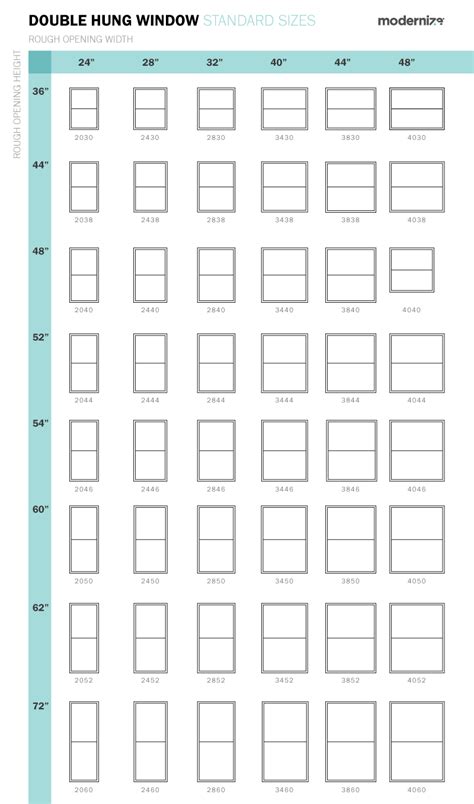 What Are Standard Window Sizes? A Comprehensive Guide
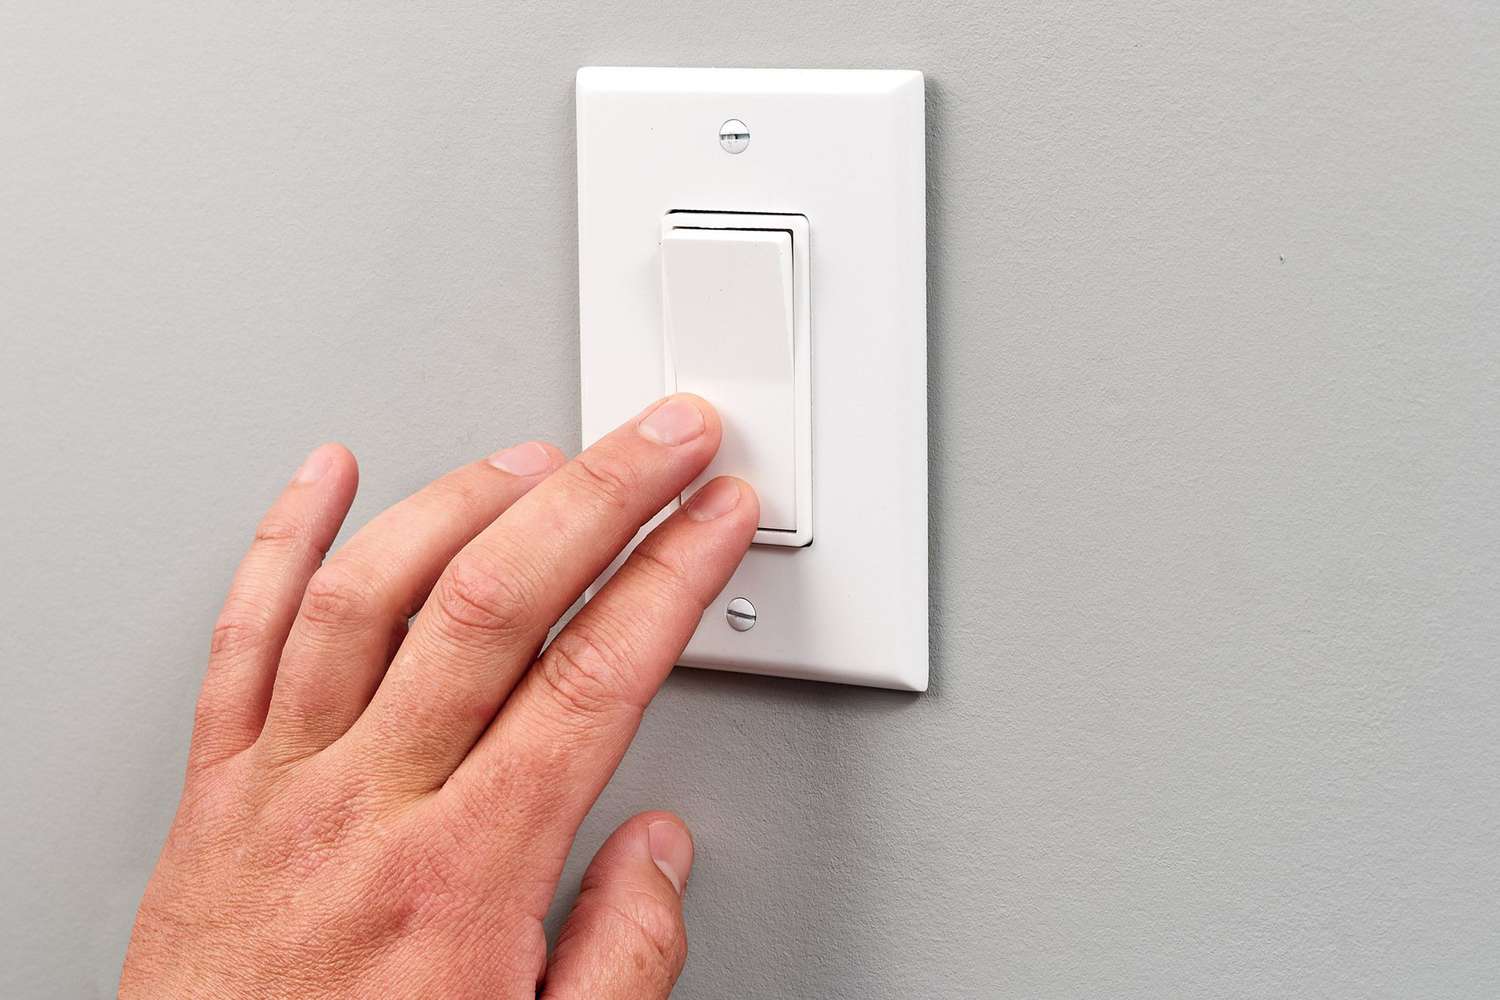 Steps to Repair a Non-Functional Light Switch
 Steps for Sowing Grass Seed on an Established Lawn
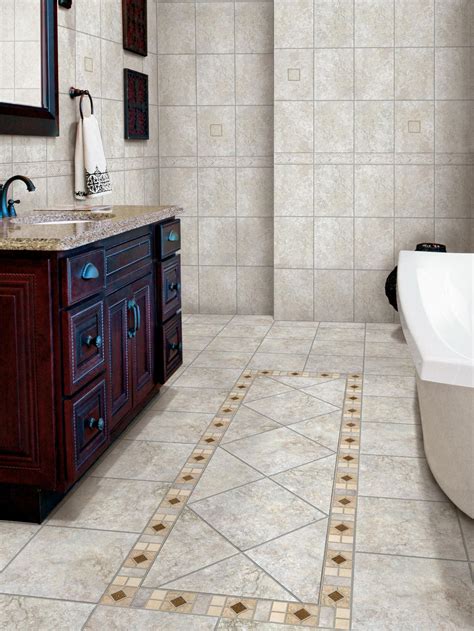 How to Tile a Bathroom Floor – A Step-by-Step Guide