
Before You Begin
Installing laminate flooring is a great way to enhance the aesthetics of your home. Before you get started, here are a few essential steps to take:
Test the Flooring Layout
Before installing the laminate flooring, lay out a few rows of planks without attaching them to ensure a proper fit and visual appeal. This will help you make any necessary adjustments and plan the layout effectively.
Install the Underlayment
An underlayment is crucial for laminate flooring as it provides stability, soundproofing, and helps to smooth out any imperfections in the subfloor. Roll out the underlayment and secure it in place, ensuring there are no gaps or overlaps.
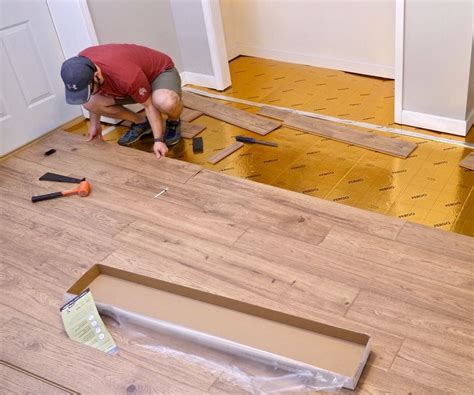
Installing Laminate Flooring: Step-by-Step
Begin the First Row of Planks
Start by placing the first plank in the corner of the room, with the tongue side facing the wall. Leave a ¼ inch gap between the plank and the wall to allow for expansion. Use spacers to maintain this gap throughout the installation process.
Finish the First Row
Continue installing planks in the first row, using a tapping block and a hammer to secure the planks tightly together. Trim the last plank in the row to fit, leaving the same ¼ inch gap at the end.
Plan the Next Rows
For the second row and beyond, stagger the planks to create an appealing pattern. This will enhance the stability of the flooring and create a more natural look. Use a saw to cut the first plank in each row to the desired length.
Continue Laying More Rows
Repeat the process of installing each row, using the tapping block and hammer to ensure a snug fit between the planks. Remember to maintain the proper gap along the walls and between the rows.
Install the Last Row
When you reach the final row, you may need to cut the planks to fit the space. Measure carefully and use a saw to make precise cuts. Attach the final row, ensuring a tight fit.
Tips and Common Mistakes
Tips for Cutting Laminate Flooring
Here are a few tips for cutting laminate flooring:
- Measure twice and cut once to avoid mistakes
- Use a fine-toothed saw blade to prevent chipping
- Make straight cuts by using a straight edge as a guide
- For intricate cuts, use a jigsaw or a laminate-specific cutting tool
Common Mistakes When Laying Laminate Flooring
Avoid these common mistakes when installing laminate flooring:
- Not acclimating the flooring to the room’s humidity and temperature
- Skipping the use of underlayment, which can lead to noise and stability issues
- Failure to maintain the proper expansion gap along the walls
- Rushing the installation process, resulting in poor-quality workmanship
FAQs (
Frequently Asked Questions)
1. Can I install laminate flooring over existing flooring?
Yes, you can install laminate flooring over some existing flooring types, such as vinyl, linoleum, and hardwood. However, it’s important to ensure that the existing flooring is in good condition, clean, and level. Consult the manufacturer’s guidelines for specific recommendations.
2. Can I install laminate flooring in wet areas like bathrooms or basements?
Laminate flooring is not recommended for wet areas or areas prone to excessive moisture, such as bathrooms or basements. Moisture can seep into the planks, causing them to warp and damage the floor. Consider alternative flooring options suitable for these areas, such as vinyl or tile.
3. How long does it take to install laminate flooring?
The time it takes to install laminate flooring depends on various factors, including the size of the room, the complexity of the layout, and your experience level. On average, it can take anywhere from a few hours to a couple of days to complete the installation.
Now that you have a comprehensive guide on how to install laminate flooring, you can confidently take on this home improvement project. Enjoy the process and revel in the beauty of your newly transformed floors!
Similar posts:
 Understand the Regulations for Clearance Above Power Lines
 Master the Art of Cleaning Air Conditioner Coils for Optimal Cooling Efficiency
 Tips for Cultivating and Maintaining Brass Buttons
 DIY Fabric Painting: Step-by-Step Guide to Creating Stunning Designs
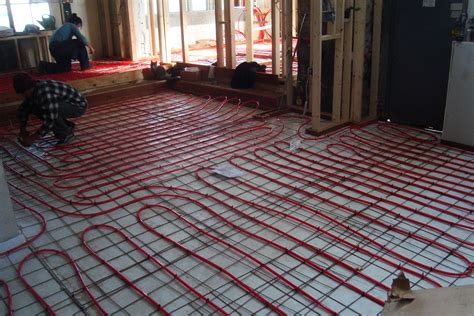 Electric Radiant Floor Heating: The Basics
 Eggshell vs. Semi-Gloss: Which Type of Paint Is Best Suited for Your Project?